Difference between revisions of "Capital Ships"
| (44 intermediate revisions by 2 users not shown) | |||
| Line 7: | Line 7: | ||
List of known issues and bugs related to Capital ships and Capital ship docks. | List of known issues and bugs related to Capital ships and Capital ship docks. | ||
'''Thruster Module Nozzle Ring snap issue''' | '''Thruster Module Nozzle Ring snap issue''' | ||
| Line 53: | Line 51: | ||
'''Prerequisites:''' | |||
Capital ship devices and parts require [[Materials#Alloy materials|Alloys]] meaning [[Alloy furnace| alloy crafting]] should be established first. | *Station with at least two build areas. Capital Ship Creation starts with building Capital Ship Dock to empty build area at station. Dock has maximum size which limits how big Capital Ship can be at first, but the building and expanding can be continued after leaving the dock with the ship. | ||
*Capital ship devices and parts require [[Materials#Alloy materials|Alloys]] meaning [[Alloy furnace| alloy crafting]] should be established first. Alloy crafting is unlocked in Advanced Tech Tree. | |||
Parts for Capital Ship are unlocked in the Advanced Tech Tree after which those are available in "Capital Ships" section of the Crafting Window. | *Parts and dock for Capital Ship are unlocked in the Advanced Tech Tree after which those are available in "Capital Ships" section of the Crafting Window. | ||
*When Capital ship is ready for fast travel it can fast travel to destinations saved into Navigation Chips with [[Navigation Data Logger|Navigation Data Logger]]. Navigation Data Logger is also unlocked in Advanced Tech Tree. | |||
When Capital ship is ready for fast travel it can fast travel to destinations saved into Navigation Chips with [[Navigation Data Logger|Navigation Data Logger]] | |||
| Line 66: | Line 61: | ||
==Create a station== | ==Create a station== | ||
Start by creating a station as you normally would. Make sure to build a Basic and an Advanced Crafting Bench to your station - you'll need those to craft the items required for the Capital Ship and the Dock. | Start by creating a [[Player Stations|station]] as you normally would. Make sure to build a [[Basic crafting bench| basic]] and an [[Advanced crafting bench|Advanced Crafting Bench]] to your station - you'll need those to craft the items required for the Capital Ship and the Dock. | ||
Capital Ship Dock requires empty station build area. This is to maximize the build size of your Capital Ship dock and the Capital Ship itself. Expand the Easy Build Area of your station and start building the Dock into the empty one. | Capital Ship Dock requires empty station build area. This is to maximize the build size of your Capital Ship dock and the Capital Ship itself. Expand the Easy Build Area of your station and start building the Dock into the empty one. | ||
| Line 109: | Line 104: | ||
* The shell is built by covering the beams with Capital Ship Block Modules from the outside, found in the Crafting menu | * The shell is built by covering the beams with Capital Ship Block Modules from the outside, found in the Crafting menu | ||
**Shell also can be built by using single parts which are made from Alium or Exutium. These are found in the crafting menu (Capital Ships/Single Parts) | **Shell also can be built by using single parts which are made from Alium or Exutium. These are found in the crafting menu (Capital Ships/Single Parts) | ||
**Windows also count as shell but glass material has slightly inferior shell rating when compared to Alium and Exutium | **Windows also count as shell but glass material has slightly inferior shell rating when compared to Alium and Exutium | ||
**Kutonium material has greater negative impact on shell rating when exposed. For example following capital ship devices have Kutonium material: Generator Unit, Exorium Tank, Exorium processing Unit, shield generator and Fast travel core. This means that shell rating score will drop more, if said devices are not inside the ship. | |||
<gallery widths=600px heights=500px mode="nolines"> | |||
File:SB_05052022_capital_ship_frame_shell_example.jpg| Frame and Shell | |||
File:Capital_Ship_shell_single_parts_alium_14042022.JPG| Plating built with big Alium plates | |||
</gallery> | |||
* You can place the first piece of the ship anywhere on the Dock's build area, and then start attaching other parts to it in Easy Build Mode (hotkey ".") | * You can place the first piece of the ship anywhere on the Dock's build area, and then start attaching other parts to it in Easy Build Mode (hotkey ".") | ||
* Capital Ship Dock has same orientation indicator as in Ship Designer. Blue arrow indicating forward direction for the ship. | * Capital Ship Dock has same orientation indicator as in Ship Designer. Blue arrow indicating forward direction for the ship. | ||
* Use the integrity view found in build mode toolbar to see any issues with the ships frame integrity | * Use the integrity view found in build mode toolbar to see any issues with the ships frame integrity | ||
<gallery widths=600px heights=500px mode="nolines"> | |||
File:SB_030522_capital_ships_integrity_check_1.JPG|Integrity View | |||
</gallery> | |||
===Build the devices=== | ===Build the devices=== | ||
| Line 128: | Line 132: | ||
* Fast Travel Core - consumes electricity and charges the ship for fast travel | * Fast Travel Core - consumes electricity and charges the ship for fast travel | ||
* Shield Generator - consumes electricity and charges the ship for fast travel | * Shield Generator - consumes electricity and charges the ship for fast travel | ||
<gallery widths=300px heights=300x mode="nolines"> | |||
File:SB_05052022_capital_exorium_tank.png| Exorium Tank Module | |||
File:SB_05052022_capital_exorium_processing_unit.png| Exorium Processing Unit Module | |||
File:SB_05052022_capital_generator.png| Generator Module | |||
File:SB_05052022_capital_fast_travel_tank.png| Fast Travel Propellant Tank Module | |||
File:SB_05052022_capital_fast_travel_core.png| Fast Travel Core Module | |||
File:SB_05052022_capital_shield_generator.png| Shield Generator Module | |||
</gallery> | |||
====Thrusters==== | ====Thrusters==== | ||
| Line 136: | Line 149: | ||
* Thruster Module Nozzle End | * Thruster Module Nozzle End | ||
* Thruster Module Nozzle Support | * Thruster Module Nozzle Support | ||
<gallery widths=300px heights=300x mode="nolines"> | |||
File:SB_05052022_capital_thruster_frame.png| Thruster Module Frame | |||
File:SB_05052022_capital_thruster_nozzle_ring.png| Thruster Module Nozzle Ring | |||
File:SB_05052022_capital_thruster_nozzle_end .png| Thruster Module Nozzle End | |||
File:SB_05052022_capital_thruster_nozzle_support.png| Thruster Module Nozzle Support | |||
</gallery> | |||
In order to function, a thruster needs to be built entirely inside one Capital Ship build area. | In order to function, a thruster needs to be built entirely inside one Capital Ship build area. | ||
| Line 147: | Line 168: | ||
Thruster Module Frame and Thruster Module Nozzle Support need to be in contact with the ship frame. | Thruster Module Frame and Thruster Module Nozzle Support need to be in contact with the ship frame. | ||
<gallery widths=400px heights=400px mode="nolines"> | |||
File:Thrusters.jpg|300px|Various sizes of a complete capital ship thruster | |||
</gallery> | |||
===Build the supply conduit=== | ===Build the supply conduit=== | ||
| Line 160: | Line 183: | ||
A Supply Conduit can be bigger than this, but all open ends must be sealed with the Supply Conduit End part. For example, you can build it to reach all the devices of your ship, and place multiple Supply Conduit Nexus on it to serve as connection points | A Supply Conduit can be bigger than this, but all open ends must be sealed with the Supply Conduit End part. For example, you can build it to reach all the devices of your ship, and place multiple Supply Conduit Nexus on it to serve as connection points | ||
<gallery widths=400px heights=400px mode="nolines"> | |||
File:supply_conduit_pieces_2.jpg| Minimum complete Supply Conduit | |||
</gallery> | |||
Terminals (or consoles) needed to manage the Supply Conduit: | Terminals (or consoles) needed to manage the Supply Conduit: | ||
| Line 169: | Line 194: | ||
These need to be within 10 meters of a Supply Conduit Nexus in order to function. | These need to be within 10 meters of a Supply Conduit Nexus in order to function. | ||
<gallery widths=400px heights=400px mode="nolines"> | |||
File:terminals_supply_conduit_nexus_14042022.jpg|Terminals | |||
</gallery> | |||
===Connect Devices to the Supply conduit=== | ===Connect Devices to the Supply conduit=== | ||
| Line 182: | Line 209: | ||
[[File:Connecting devices 540p.mp4|300px]] | [[File:Connecting devices 540p.mp4|300px]] | ||
==Set up resource production== | |||
Once your devices and supply conduit are built, they're ready to be used. It all starts at the Liquid Exorium tanks, used to create Exorium Fuel by the Exorium Processsing Unit. The Exorium Fuel is then used by the generator to produce electricity, which is used by the Fast Travel Core and Shield Generator when they're charged up for fast travel. | Once your devices and supply conduit are built, they're ready to be used. It all starts at the Liquid Exorium tanks, used to create Exorium Fuel by the Exorium Processsing Unit. The Exorium Fuel is then used by the generator to produce electricity, which is used by the Fast Travel Core and Shield Generator when they're charged up for fast travel. | ||
| Line 188: | Line 215: | ||
Make sure your Liquid Exorium tanks and Propellant tanks are filled. You can look at the Storage levels for each tank in the Resource Summary Terminal to see how much of each resource you currently have. | Make sure your Liquid Exorium tanks and Propellant tanks are filled. You can look at the Storage levels for each tank in the Resource Summary Terminal to see how much of each resource you currently have. | ||
<gallery widths=400px heights=400px mode="nolines"> | |||
File:Rsource_summary_14042022.JPG| Resource Summary Terminal | |||
</gallery> | |||
The tanks can be refilled by walking up to them and using Filler Tools that are available in the Crafting menu. | The tanks can be refilled by walking up to them and using Filler Tools that are available in the Crafting menu. [[Tools %26 weapons crafting bench| Tools & Weapons crafting bench]] is needed in order to craft Filler Tools. | ||
Once the tanks are full, first start the production of Exorium Fuel, and then electricity. This can be done at the Station Utility Grid Terminal by following these steps: | Once the tanks are full, first start the production of Exorium Fuel, and then electricity. This can be done at the Station Utility Grid Terminal by following these steps: | ||
| Line 199: | Line 229: | ||
* Press the Edit button or Enter to Apply | * Press the Edit button or Enter to Apply | ||
<gallery widths=500px heights=500px mode="nolines"> | |||
File:Resource_management_14042022.JPG| | |||
</gallery> | |||
===Charging the Fast Travel Core and Shield generator=== | |||
Charging the Fast Travel Core and Shield generator begins once you've selected a destination in The Fast travel | Charging the Fast Travel Core and Shield generator begins once you've selected a [[Navigation Data Logger|destination]] in The Fast travel Terminal, and started the countdown after a successful integrity check. | ||
Note that the Fast Travel Core has a maximum electricity intake of 10 000 units per second. This means that if you set your Electricity Production to 70 000 (and the Exorium Fuel production accordingly), 60 000 units will be used to charge the Shield Generator, which has no maximum electricity intake. | Note that the Fast Travel Core has a maximum electricity intake of 10 000 units per second. This means that if you set your Electricity Production to 70 000 (and the Exorium Fuel production accordingly), 60 000 units will be used to charge the Shield Generator, which has no maximum electricity intake. | ||
| Line 210: | Line 241: | ||
If the the Shield Generator is already at 100% charge, any electricity produced beyond 10 000 units will go to waste. The charge level can be checked from the Fast Travel Terminal screen once a fast travel process has been initiated and resource production set to produce electricity. | If the the Shield Generator is already at 100% charge, any electricity produced beyond 10 000 units will go to waste. The charge level can be checked from the Fast Travel Terminal screen once a fast travel process has been initiated and resource production set to produce electricity. | ||
==Fast travel== | |||
Once you have a functioning capital ship, you can test the fast travel functionality. Once you've selected a destination from the Fast Travel Terminal, the System check tells you whether or not the requirements for fast travel are met. | |||
Fast travel destinations are the coordinates saved into Navigation Chips with [[Navigation Data Logger|Navigation Data Logger]]. Having Navigation Chip with saved coordinates in inventory will show the destination in Fast Travel Terminal. | |||
<gallery widths=500px heights=500px mode="nolines"> | |||
File:Fast_travel_terminal_14042022.JPG| | |||
File:Fast_travel_terminal_2_info_14042022.jpg| | |||
</gallery> | |||
After you make any changes related to the requirements (e.g. filled up fuel tanks or increased electricity production), you can press the "Update system check" button to see the effect they've had. | After you make any changes related to the requirements (e.g. filled up fuel tanks or increased electricity production), you can press the "Update system check" button to see the effect they've had. | ||
As first voyage it is highly | As first voyage it is highly recommended to save navigation chip near the station where Capital Ship Dock is located and travel to this location. | ||
*This is to ensure your capital ship has everything installed and stored which are needed for proper movable base such as crafting benches, [[Reconstruction machine| reconstruction machines]] and ship hangars. | |||
A community formula for the maximum speed of the capital is 8+6*(1-x) km/s with x being the percentage of Capital Ship maximum volume. In the above picture, 78% would correspond to 8+6*(1-78/100) = 9.32 km/s | |||
[[Category:Collection]] [[Category:Guides]] | [[Category:Collection]] [[Category:Guides]] | ||
Latest revision as of 23:11, 27 July 2024
Note: currently you can have max. 4 owned stations. Capital ships are considered stations and count towards the maximum station count.
Known Issues
List of known issues and bugs related to Capital ships and Capital ship docks.
Thruster Module Nozzle Ring snap issue
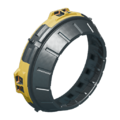
- The Nozzle Ring module of Capital ship thruster looks symmetrical, and like it should snap into place with any rotation. There is an issue however, which causes it to not snap into place correctly if its rotation is off by 90 degrees.
Ships at capital ship warp destination are not deleted properly if they are being hosted by someone
- While hosted ships are deleted from the owner's ship list after being warped on by capital ship, the ship itself exists until the player hosting it stops hosting the ship.
Being killed by capital ship fast travel while it deletes the ship underneath can cause player to be able interact with world for a moment
- Being killed by capital ship fast travel while standing on a ship causes the player to be able to interact with the world for a short period of the player drops onto another surface as the regular ship is deleted. The issue does not seem to reoccur when player is killed while inside the capital ship after the fast travel.
Capital ship thrusters are not recognized as valid if they are on more than one build area
- Capital ship thrusters are not recognized as valid if they cross any expansion border. This is intended, behavior but is currently not conveyed to players in any way.
Capital ship easy build mode visualization state is not correctly turned off if player leaves the ship area while it is on
- Capital ship easy build mode border state is remembered incorrectly if player leaves the capital ship area while they are on. This causes the borders to always be visible when the player comes to the capital ship area instead of just being visible when easy build mode is toggled on.
Capital ship warp panel keeps the selected warp destination even though the chip has been removed from the player's inventory
If Fast Travel Core is removed and added back during countdown, system check does not find it, providing different results every press
- The system check cycles between two different results with each press, cancelling the current countdown fixies this. Other components are found just fine during countdown system check if they are removed and added back.
It is possible to warp while the capital ship weights too much, if you put down the objects that take it over the limit and warp before the mass is updated
- Up to date mass calculations seem to take a while to arrive, so this is possible to do.
Capital ship frame beams have been updated with new models. (PTU ONLY)
- Older versions which already have been placed won't update automatically. Old frame versions still count as valid frame so it is not necessary to replace these. However lower object count can be achieved by using new frame pieces.
The snapping methodology of supply conduit modules has been improved. (PTU ONLY)
- Supply conduit modules installed before 10.12.2021 will not be compatible with the new system, but will still function (provided they did so previously).
Upcoming planned changes
The following are current plans, and their details might change before actual implementation.
Capital Ship Docks
- Larger dock support is planned for the future.
Capital Ships
- Capital ships will be able to start moving almost instantly, but at a speed of 1 km/s. Charging the Fast travel core and Shield generator will provide greater speeds: 40 km/s or even more, depending on the charge time.
How to build capital ships
Follow these instructions to get started on your capital ship building project.
Prerequisites:
- Station with at least two build areas. Capital Ship Creation starts with building Capital Ship Dock to empty build area at station. Dock has maximum size which limits how big Capital Ship can be at first, but the building and expanding can be continued after leaving the dock with the ship.
- Capital ship devices and parts require Alloys meaning alloy crafting should be established first. Alloy crafting is unlocked in Advanced Tech Tree.
- Parts and dock for Capital Ship are unlocked in the Advanced Tech Tree after which those are available in "Capital Ships" section of the Crafting Window.
- When Capital ship is ready for fast travel it can fast travel to destinations saved into Navigation Chips with Navigation Data Logger. Navigation Data Logger is also unlocked in Advanced Tech Tree.
Create a station
Start by creating a station as you normally would. Make sure to build a basic and an Advanced Crafting Bench to your station - you'll need those to craft the items required for the Capital Ship and the Dock.
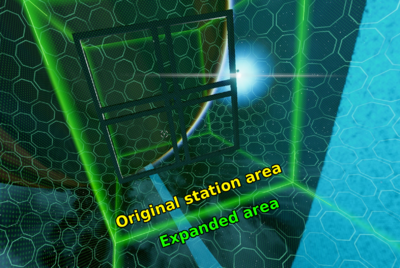
Capital Ship Dock requires empty station build area. This is to maximize the build size of your Capital Ship dock and the Capital Ship itself. Expand the Easy Build Area of your station and start building the Dock into the empty one.
Create a capital ship dock on your station
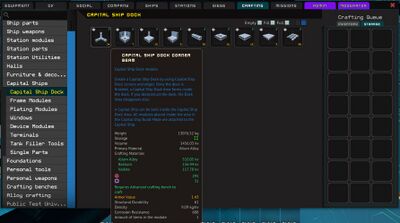
You can construct the Dock by crafting and using parts found in the Capital Ships section of the Crafting menu. The parts for the actual Capital Ship are in the same place, so be sure to use the ones named "Capital Ship Dock..." etc.
After crafting the parts, place them into your hotbar (enabled with F3) from the Crafting menu
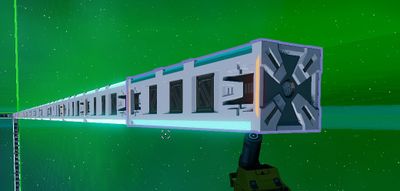
Start building dock into empty build area. When having corner dock part in hand there should be holograms visible in the build area corners. Start building dock by using the holograms as starting point. Corner dock modules should snap into the holograms.
When there is at least one corner part in place you can start placing side pieces. You can use continuous straight line placement by placing one and then holding M1 and moving mouse to the direction of the next part.
It's recommended to use Easy Build Mode (enable/disable by pressing the "." key) for faster building, but the Dock can be built outside of EBM as well by using the hotbar to place items in the world, and then welding the pieces in to place with the Weld Tool.
The biggest difference between the two modes is that Easy Build Mode automatically welds the modules and parts in place when you snap them into place in the world.
- If a part is outlined with purple once placed in the scene, it means that you don't have any more of those parts in your inventory, and that the part is only created as a placeholder "hologram". If this happens, just craft more at the workbench and you're good to go.
- Placeholders can be removed by grabbing them with E, and then by pressing Esc.
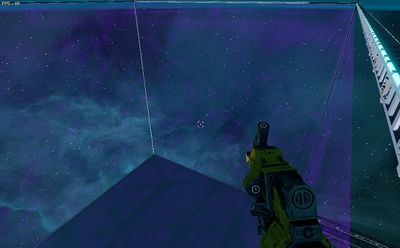
- Once the last part is placed and your dock is complete, a purple force field should form around it, forming the build area inside the dock.
Create a capital ship
To create a functioning Capital Ship, you'll need the following things: a frame, an outer shell, some devices, and a Supply Conduit. It's recommended to build your first ship in that order to make things easier for yourself, but you can do it any order you want.
Build the frame and the outer shell
You can build the frame (i.e. the bone structure) and the outer shell (i.e. plating) of the Capital Ship by crafting and using parts found in the same place as the Dock parts, under the Capital Ships section of the Crafting menu. The building process is similar to creating the Dock, only this time it happens inside the Dock's build area.
- The frame is built by attaching beams ("Capital Ship Frame Modules" in the Crafting menu) to each other
- All of the beams need to be attached to another beam in order to pass an integrity check
- Frame has to be continuous meaning there can't be multiple frames. Connecting two frame beams with just a Plating Block Module would lead to a failure in the structural integrity.
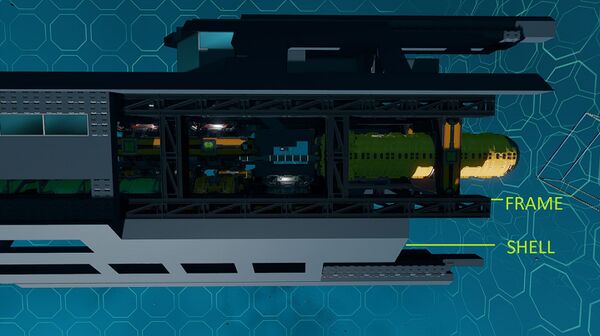
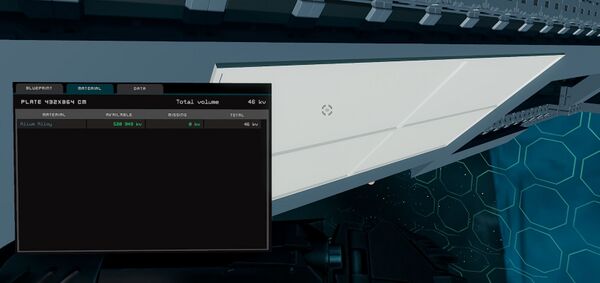
- The shell is built by covering the beams with Capital Ship Block Modules from the outside, found in the Crafting menu
- Shell also can be built by using single parts which are made from Alium or Exutium. These are found in the crafting menu (Capital Ships/Single Parts)
- Windows also count as shell but glass material has slightly inferior shell rating when compared to Alium and Exutium
- Kutonium material has greater negative impact on shell rating when exposed. For example following capital ship devices have Kutonium material: Generator Unit, Exorium Tank, Exorium processing Unit, shield generator and Fast travel core. This means that shell rating score will drop more, if said devices are not inside the ship.
- You can place the first piece of the ship anywhere on the Dock's build area, and then start attaching other parts to it in Easy Build Mode (hotkey ".")
- Capital Ship Dock has same orientation indicator as in Ship Designer. Blue arrow indicating forward direction for the ship.
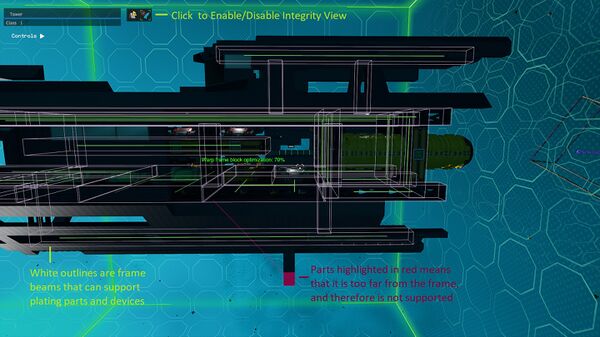
- Use the integrity view found in build mode toolbar to see any issues with the ships frame integrity
Build the devices
The devices of the capital ship can be found and constructed in the Crafting menu (Capital Ships / Device Modules)
The required devices for a functioning capital ship are;
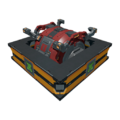
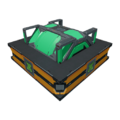
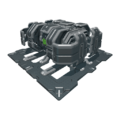
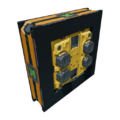
- Exorium tank - stores liquid exorium
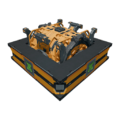
- Exorium processing unit - makes exorium fuel from liquid exorium
- Generator - makes electricity from exorium fuel
- Propellant tank - provides thrusters with propellant
- Thrusters - uses propellant to move the ship
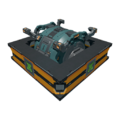
- Fast Travel Core - consumes electricity and charges the ship for fast travel
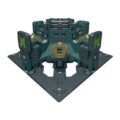
- Shield Generator - consumes electricity and charges the ship for fast travel
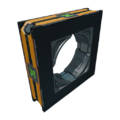
Thrusters
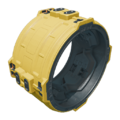
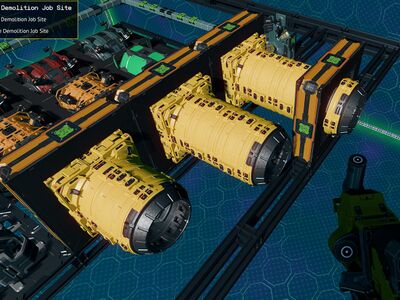
The capital ship thrusters are modular devices. A complete thruster consists of:
- Thruster Module Frame
- Thruster Module Nozzle Ring
- Thruster Module Nozzle End
- Thruster Module Nozzle Support
In order to function, a thruster needs to be built entirely inside one Capital Ship build area.
A single thruster can have multiple "Nozzle Rings" stacked together to increase the power of the thruster. Up to 10 Nozzle Rings can be added to single thruster.
A single "Nozzle Ring" adds enough power to move 500 000 kv of ship mass.
Thrusters with more than two "Nozzle Rings" require additional support structures - Thruster Nozzle Supports - to support the thruster.
Thruster Module Frame and Thruster Module Nozzle Support need to be in contact with the ship frame.
Build the supply conduit
A Supply Conduit (aka. Utility Grid) also needs to be built in order to connect the ship's devices to each other. The parts can be found in the Crafting menu.
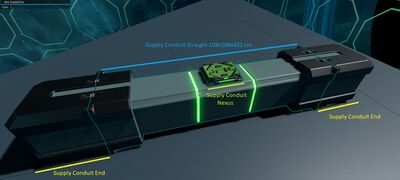
The needed parts for a functional Supply Conduit are, at a minimum, as follows:
- Supply Conduit Straight 108x108x432 cm
- Supply Conduit Nexus
- 2 x Supply Conduit End
A Supply Conduit can be bigger than this, but all open ends must be sealed with the Supply Conduit End part. For example, you can build it to reach all the devices of your ship, and place multiple Supply Conduit Nexus on it to serve as connection points
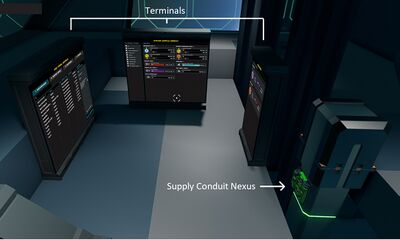
Terminals (or consoles) needed to manage the Supply Conduit:
- Station Resources Terminal
- Station Utility Grid Terminal
- Station Fast Travel Terminal
These need to be within 10 meters of a Supply Conduit Nexus in order to function.
Connect Devices to the Supply conduit
In order for the devices to function and for the terminals to display relevant info, you'll need to connect the devices to the Supply conduit you've built. Terminals do not need to be connected, it's enough that they're located close to a Supply Conduit pipe.
To connect a device to the Supply conduit, just aim at a Supply Conduit Nexus and press F or M1. A yellow line should appear, with which you can then move to a device you want to connect. With the yellow line still visible, point to the device you want to connect, and it should become highlighted in yellow, indicating that it can be connected. Press the F key/M1 again to establish the connection. A yellow line should now be drawn between the device and the Nexus, indicating an established connection.
- The maximum connection range of a Device dock is 8 meters, which is measured from the center of the Nexus to the center of the connectable device.
- The maximum amount of connections per Nexus is 10, but multiple can be used in a supply conduit.
Set up resource production
Once your devices and supply conduit are built, they're ready to be used. It all starts at the Liquid Exorium tanks, used to create Exorium Fuel by the Exorium Processsing Unit. The Exorium Fuel is then used by the generator to produce electricity, which is used by the Fast Travel Core and Shield Generator when they're charged up for fast travel.
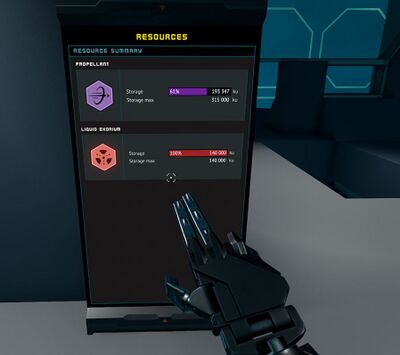
Make sure your Liquid Exorium tanks and Propellant tanks are filled. You can look at the Storage levels for each tank in the Resource Summary Terminal to see how much of each resource you currently have.
The tanks can be refilled by walking up to them and using Filler Tools that are available in the Crafting menu. Tools & Weapons crafting bench is needed in order to craft Filler Tools.
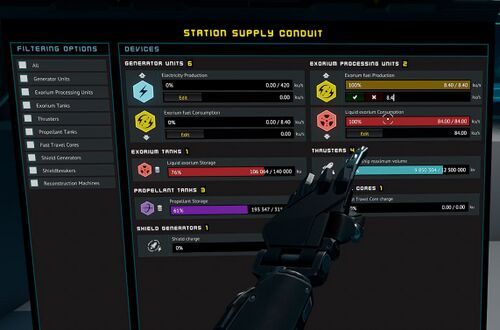
Once the tanks are full, first start the production of Exorium Fuel, and then electricity. This can be done at the Station Utility Grid Terminal by following these steps:
- Click on the desired field (e.g. Exorium fuel production)
- Set a numerical value between 0 and the maximum value shown (e.g. 8.4)
- Press Esc to deactivate the text field
- Press the Edit button or Enter to Apply
Charging the Fast Travel Core and Shield generator
Charging the Fast Travel Core and Shield generator begins once you've selected a destination in The Fast travel Terminal, and started the countdown after a successful integrity check.
Note that the Fast Travel Core has a maximum electricity intake of 10 000 units per second. This means that if you set your Electricity Production to 70 000 (and the Exorium Fuel production accordingly), 60 000 units will be used to charge the Shield Generator, which has no maximum electricity intake.
If the the Shield Generator is already at 100% charge, any electricity produced beyond 10 000 units will go to waste. The charge level can be checked from the Fast Travel Terminal screen once a fast travel process has been initiated and resource production set to produce electricity.
Fast travel
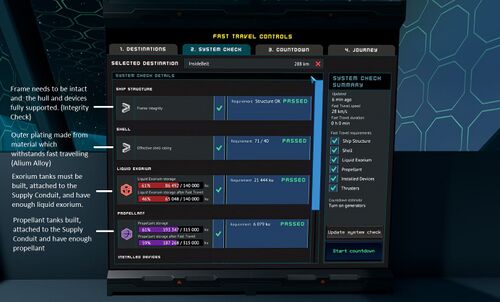
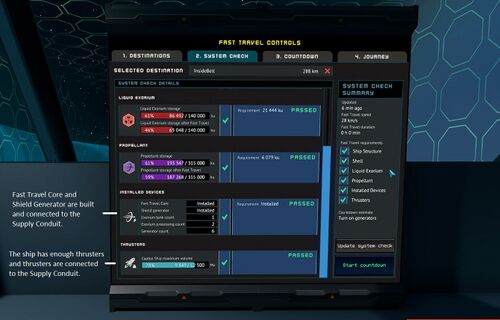
Once you have a functioning capital ship, you can test the fast travel functionality. Once you've selected a destination from the Fast Travel Terminal, the System check tells you whether or not the requirements for fast travel are met.
Fast travel destinations are the coordinates saved into Navigation Chips with Navigation Data Logger. Having Navigation Chip with saved coordinates in inventory will show the destination in Fast Travel Terminal.
After you make any changes related to the requirements (e.g. filled up fuel tanks or increased electricity production), you can press the "Update system check" button to see the effect they've had.
As first voyage it is highly recommended to save navigation chip near the station where Capital Ship Dock is located and travel to this location.
- This is to ensure your capital ship has everything installed and stored which are needed for proper movable base such as crafting benches, reconstruction machines and ship hangars.
A community formula for the maximum speed of the capital is 8+6*(1-x) km/s with x being the percentage of Capital Ship maximum volume. In the above picture, 78% would correspond to 8+6*(1-78/100) = 9.32 km/s
