Spaceship Designer Guide
The spaceship designer is an editor used to build spaceships, and offers a host of tools and functions to assist would-be designers.
UI Elements
Top bar
The top has access to several operations in the Spaceship Designer. From left to right they are:
- Settings (See the dedicated Settings section for more details)
- Window controls
- Controls which windows are open so you can keep only what you need visible. You can open / close windows by clicking the check-mark and square icons
- They are not named, but hovering over an icon opens a tooltip revealing which window's visibility it affects.
- Basic operations
- Save, remove, undo and redo
- Module controls (See the dedicated Modules section for more details)
- Test Flight Mode
Scene view
Scene view or scene is the area where ships can be designed in. It covers everything below the top bar and has a space styled skybox. Part of the scene is usually (and by default) covered with UI windows. When saving a blueprint it stores the whole scene, meaning not just the actual ship design but all placed assets and their transforms (location and rotation).
UI windows
Asset browser
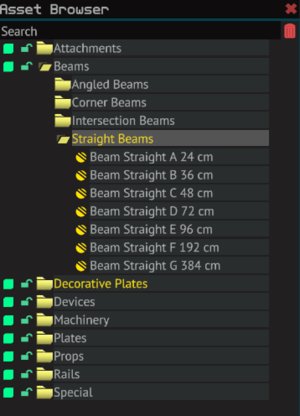
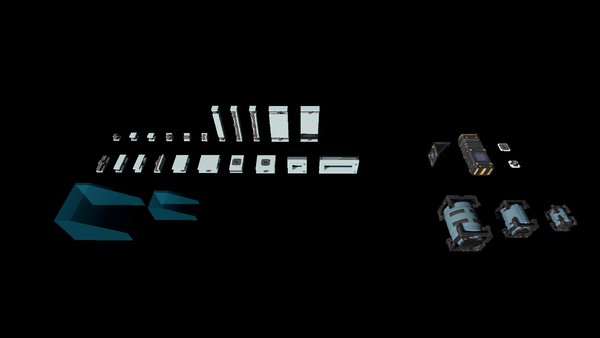
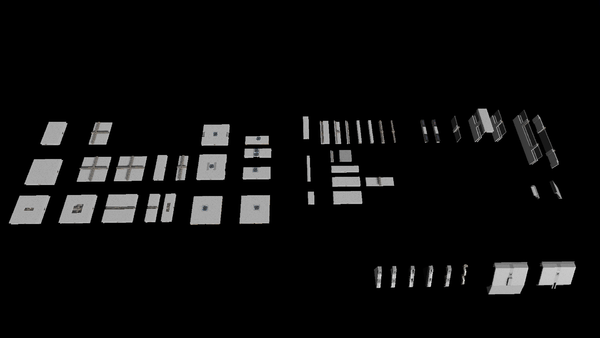
The Asset Browser works as the inventory of all your building blocks. Every object required for building a ship can be found here. From the beams to the frame structure, to YOLOL-chips for modifying your ship's gadgets, and all in between. The objects are separated into categories for ease of access. My Ship Blueprints (saved on server) -folder can be found below the asset categories. The folder stores all of your personal designs. They can be placed in the scene as whole ensembles in the same manner as any single asset.
Placement
The objects are placed in the scene by selecting the wanted asset from the Asset Browser by a single click of the MB1 (Mouse Button 1), moving it to the wanted position, and then placing it on the scene by another click of the MB1. Before placing, the object is in a preview state, which is visualized by the green highlight color of the object. The previewed object can be rotated clockwise in 90-degree intervals around the Z, Y or X axes by pressing Z, Y or X. Holding down the keys and moving mouse horizontally will rotate the object in 15-degree increments and rotation can be reset by pressing Q.
Lock assets
By pressing the green lock icon on the left side of each Asset Browser category, you can prevent objects of that category to be altered in any way. New objects from that category can still be placed but they can't be deleted, for example. A locked category is represented as a red lock icon
Hide assets
If you press the green square icon on the left side of the lock icon, you can hide the objects of that category. The opacity of those objects is set to a minimum value making them see-through. This is helpful for example when you want to observe the cabling which is behind plating.
View mode
Assets in the Asset browser can be viewed by their names or unique icons (atm there are no dedicated graphics for thumbnails, so each icon looks the same). The view can be changed by a MB2 (Mouse Button 1) click on the window.
Toolbox
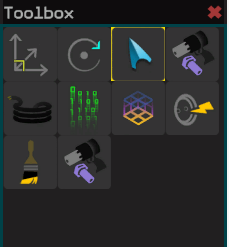
The Toolbox has all the tools that are needed for designing a ship. The currently active tool is highlighted by a yellow rounded rectangle around the tool. The available tools are explained individually in Tools-section.
MUUS
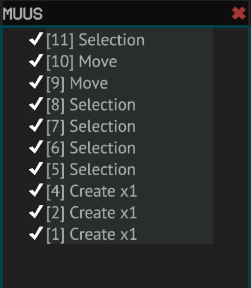
MUUS stands for Multi User Undo System. It's designed to work with multiple users who are working in the same scene, but it works like a regular undo-system when working solo. Nearly all actions create a new step into MUUS. You can undo one step at a time or choose a certain step and undo every action done after that. One-click with the MB2 on a row opens up a menu where you can choose to undo or redo that step (and any steps related to that).
Tool options
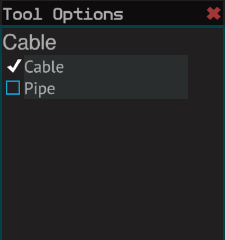
Tool options-window is reserved for any options that a tool might have. The content varies according to the selected tool. Below is an example of a view from Cable Tool options.
Scene view
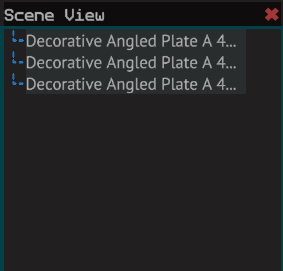
Scene view-window displays all the objects that are in the current scene in a tree structure. Modules are displayed as branches (+ shape) and individual objects as leafs (L-shape). They are in placement order from bottom to the top. If any object is removed from the scene, that object is also removed from the list. By pressing the MB2 on a row gives access to Edit component-window, which lets you edit the chosen object. You can edit the name and give it a description.
Properties
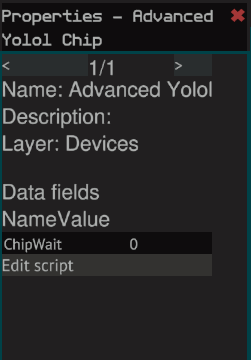
Properties-window displays various information and properties which differ from object to object. Some properties can be configured. Above is an example of a YOLOL-chip. There you can alter the chip's activation waiting time and edit the script in a separate YOLOL script editor-window.
YOLOL script editor
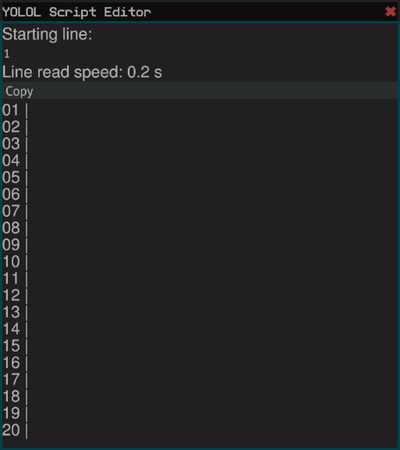
YOLOL is the Starbase programming language. YOLOL-chips in Spaceship Designer are edited from these windows. There are 20 lines available for programming. There are basic copy, paste and clear - operators available. Pressing Enter confirms and submit changes.
Alignment
UI windows' positions and sizes can be tailored according to user preference. Windows can be moved by a simple click (MB1) + drag method. Resizing is done the same way except in that case you use the MB2. You can close a window from the X symbol in its top right corner (or from the checkboxes in the top bar). By keeping the Alt-key pressed you can anchor windows to screen edges or next to each other. You can also combine windows as one, forming tabs.
There are two navigation modes in Spaceship Designer: cursor and crosshair. The cursor mode is activated by default and is recommended to use. One can toggle between cursor and crosshair modes with the Tab-key. The cursor is used when interacting with objects, tools and settings while crosshair is limited to targeting and selecting objects.
Camera movement
Crosshair mode allows free movement of the camera angle by moving the mouse. The same feature can be achieved in cursor mode by moving the mouse and holding down the MB2. Camera distance is altered by scrolling the mouse wheel. If the object is in preview mode then scrolling affects the objects depth distance. WASD keys are also used to strafe the camera view around. Holding Shift speeds up the camera movement.
Holding down Spacebar or MB3 (Mouse Button 3) while moving the mouse moves the scene to the respected direction while keeping the camera angle in the same direction.
Interacting with objects and UI elements
A single object can be selected in the scene by clicking on it with the MB1 and multiple objects can be area selected by holding the MB1 down and moving the cursor to cover the desired objects (Note: the area select also affects objects in behind of the desired ones). Another way of selecting multiple objects is done by holding down the Ctrl button while selecting desired objects with the MB1.
When an object is selected it is highlighted with a cyan glow. The selected object can then be operated with the tools available. Objects can be deselected by clicking on them again or clicking on an empty space.
Tools
Spaceship Designer has many tools and they are explained in detail in this section. Basic operators copy (Ctrl + C) and paste (Ctrl + V) are also included in the toolset.
Move tool
Hotkey: 1
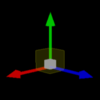
Move tool is used whenever transforming selected objects from one location to another. Movement can be done by any three axis, of which X is represented by red, Y by green and Z by blue colored arrows. Free movement is possible by clicking on the gray cube in the center of the move tool symbol.
- Select one object by a single click of the MB1
- Continue selecting individual objects by keeping the Shift-button pressed while clicking the MB1
- Remove individual objects by keeping the Ctrl -button pressed while clicking the MB1
- Use area selection with MB1 pressed down and moving the cursor over all the objects you want to choose (note: area select also affects objects behind others, so depth needs to be taken into consideration as well to prevent accidental selection of unwanted objects).
- Adding and removing from selection works as well; keep Shift pressed and area selecting only adds to the selection, and keep Ctrl pressed and area selecting only removes from the selection
Rotate tool
Hotkey: 2
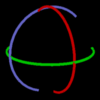
Rotate tool is for rotating objects around its axels. Similar to the move tool the rotate tool is also operated by clicking and dragging on the widget but instead of arrows you select curves. Red for X, green for Y and blue for Z. The rotation is done by 15 degree intervals. The selected object can also be rotated in 90-degree intervals around the Z, Y or X axes by pressing Z, Y or X. Holding down the keys and moving mouse horizontally will rotate the object in 15-degree increments and rotation can be reset by pressing Q.
Select tool
Hotkey: 3
The select tool is used when selecting single objects or several objects at once. Selected objects are represented with a bright blue highlight.
- Select one object by a single click of the MB1
- Continue selecting individual objects by keeping the Shift-button pressed while clicking the MB1
- Remove individual objects by keeping the Ctrl -button pressed while clicking the MB1
- Use area selection with MB1 pressed down and moving the cursor over all the objects you want to choose (note: area select also affects objects behind others, so depth needs to be taken into consideration as well to prevent accidental selection of unwanted objects).
- Adding and removing from selection works as well; keep Shift pressed and area selecting only adds to the selection, and keep Ctrl pressed and area selecting only removes from the selection
Bolt Tool
Hotkey: 4
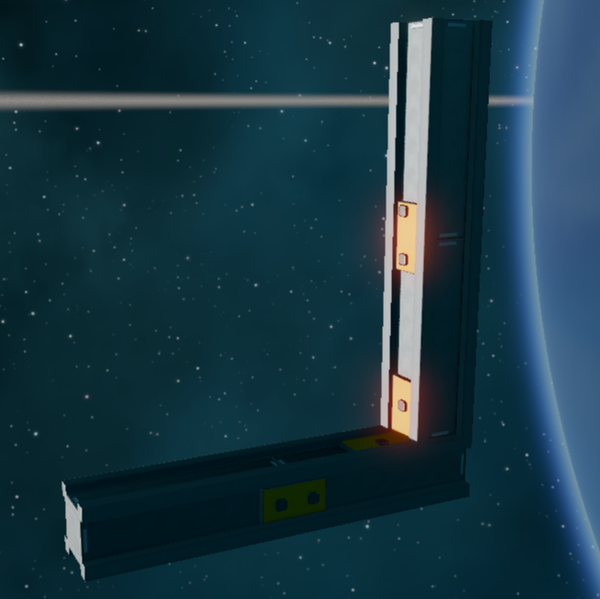
Every object in Spaceship Designer needs to be bolted together. The frame is bolted using attachment plates which connect the beams together. All other objects such as plates are bolted to the frame but attachment plates aren't needed for those. Bolting is done by simply choosing the Bolt Tool and pointing the cursor to any surface. A green ring symbol appears orientated to the surface signalling that a bolt can be placed there. A purple ring with an x crossed over it signals that a bolt can't be placed there. Usually, this happens when there are no other objects beneath the chosen one or that the chosen object is too thick for the bolt to penetrate through. Gadgets and machinery can also be bolted only in specific places usually highlighted with yellow color.
Bolting beams together using attachment plates
Cable Tool
Hotkey: 5
Cable Tool is used for transferring data, electricity and fuel (propellant) around the ship. The Cable Tool actually consists of two tools: cable tool and pipe tool of which the former is used to transfer data and electricity for various gadgets and the latter for feeding propellant to the thrusters. You can choose which mode to use from the Tool options-window. Cable is a narrower and blue in color, whereas pipe is larger in diameter and colored yellow. Both tools are used in the same way:
- Adding cable/pipe
- Aim and shoot at the spot you want the cable/pipe to start from with MB1
- Aim and shoot at the spot you want the cable/pipe to end with MB1
- To stop adding cable/pipe, aim and shoot at the last added point with MB2. Connecting to a socket or cable/pipe will also stop adding more cable/pipe.
- Removing cable/pipe
- Aim and shoot at a cable with MB2 to remove it.
Cable/pipe connections are made when the cable/pipe is continuous and both ends reach their corresponding sockets. From fuel tank to thrusters, and from the generator to data sockets.
Durability Tool
Hotkey: 6
The Durability Tool is one of the most important tools when designing a ship, because it shows if the ship can withstand the forces directed to it when it’s actually used. When activated, the tool shows a visualization of the ship’s vulnerable parts. Those parts can then be easily remedied by adding extra bolts or sometimes by rethinking the design and adjusting some parts to make a stronger, more durable ship. Choose the Durability Tool and press the MB1 anywhere on the ship to display the ship’s durability status. All parts that are well placed and secure are highlighted as green, parts that aren’t durable enough are highlighted as red and parts that remain unbolted are left without a color highlight.
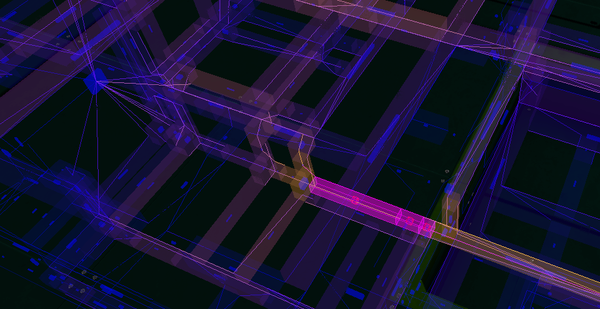
Pressing the MB2 initiates the ship's frame integrity check. If the frame design is not balanced enough, certain sections may encounter too much stress. Failing beams are shown in magenta while warning levels are displayed as shades between blue and orange/brown. Mass flow between beams is displayed as lines.
The magenta-colored section of beams is too weak. It displays the frame integrity failing.
Snap tool
Hotkey: 7
Snap tool helps to align objects properly without the risk of gaps or collisions. Objects are aligned correctly only by properly snapping them.
- Step 1: select the snap tool
- Step 2: hover on the chosen object which you want to move until the snap points are revealed
- step 3: click (MB1) on the snap point. That snap's colour turns green signalling that it's been chosen
- Step 3: point and hover on the recipient object and choose the snap point you wish to align with the previously chosen one
- step 4: observe the results: if the object moved to the place you desired then it's all good, but if the object returned to its original position, then there was probably a collision that prevented the snapping. In such case, re-evaluate the situation and go to step 2.
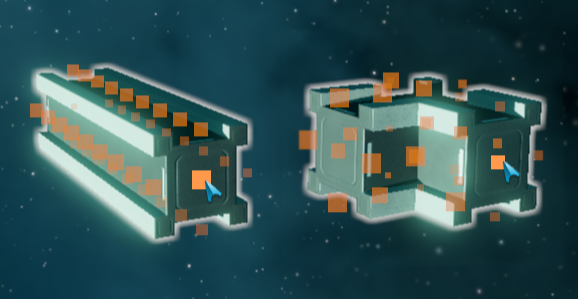
Snapping is based on snap points, which behave like opposite magnetic fields and are drawn to each other when placed nearby. The snap points have been placed on each object beforehand, and the placement is consistent throughout each of the categories. I.e. different shaped beams all have snap points in the same places you would expect as seen in the pic below (orange squares represent the snap points).
Autobolt Tool
Hotkey: 9
The Autobolt Tool is used to bolt and unbolt selected objects or the whole scene at once. It saves a lot of time when you don't have to manually bolt all parts yourself. It can be used as a backup bolt check and it is useful in reaching the difficult bolting spots. Choose selected options from the Tool options-window and click on the scene. Following is an example of the process of bolting a selected group of objects:
- Choose select-tool
- Select the desired objects to be bolted together
- Select the Autobolt-tool
- Open the Tool options -window
- Set Add bolts and Apply to selection as true (all else false)
- Click on the scene
Modules
In Spaceship Designer you can create useful modules and link several objects together, forming object groups. Module objects look like green circles, and if you select them, you can move or rotate all the objects in that module at once. It is useful to form groups of objects under a single module, because they are then easy to move around. A useful set of modules have been pre-assembled and put under the modules_spaceship -folder in the Asset Browser. It is preferable that you start designing with them because they are much more failure-proof and can help make the design process faster. After getting familiar with the editor and the whole design process, you can experiment with designing ships from scratch by selecting them from the Asset Browser’s top folders object by object.
Module controls are found next to the basic operations. The leftmost button which has a green plus on it is used to create a new module (hotkey: Ctrl + E). If you have any objects selected, then those will automatically be linked to the newly created module. Next button with upwards pointing arrow (Hotkey: Ctrl + R + MB1) is used to link selected objects to a desired module. The next button with an arrow pointing down (hotkey: Ctrl + R) removes a link between objects and modules. The rightmost button of the group is used to delete modules. Take notice that when a module is deleted all objects linked to it will be removed as well.
Modules can also be added under modules, thus creating a hierarchy.
The basic set of modules found under: modules_spaceship\spaceship_modules_starter_kit
The modules found under: modules_spaceship\spaceship_modules_starter_kit
Toolbar
The leftmost elements are the File, Selection and Settings.
- File
- New: Opens a new empty scene.
- Open premade blueprint...: Prompts a window and lets you choose to open one of the game developers premade ship scenes.
- Open my blueprint: Prompts a window and lets you choose to open one of your previously saved ship scenes.
- Save: Saves the current scene. If the scene has not been saved before pressing save will open the Save as...' window instead.
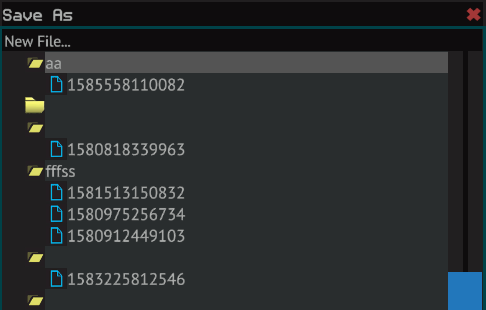
- Save as...: Prompts a window and lets you save the current scene with a name of your choosing.
- Save selection as...: Prompts a window and lets you save the current selection of objects with a name of your choosing.
- Save Blueprint and Buy Custom Ship: Saves the blueprint and proceeds you to the ship buying window that lets you buy your own custom made ship.
- Reset Editor Camera to Origin: Resets the camera back to its default place.
- Restore Window Layout: Restores the windows back to their original default places.
- Save Blueprint and Exit: Saves the blueprint as you exit Spaceship Designer
- Selection
- The Selection section gives players control over the selections of all the assets in the scene at once. There are three selection categories which all have the same (almost) content. The content is the same as the categories in Asset Browser. So choosing an asset category from any of the three available options: Select…, Deselect… or Toggle… allows selecting or deselecting those chosen asset categories.
E.g. Select → Plates selects all the assets in the scene under the Plates-category, and choosing Deselect → Plates does the opposite. The third option category Toggle toggles between selection and deselection of assets. Under the Select… category there is a Relative to current selection [x] option that is a boolean variable. When set true [1] all selections are added to the previous selection and when set as false [0] the previous selection is deselected when selecting new categories.
- Settings
- Settings open in a separate window which is the settings window for the whole game. The settings window has own tabs for Spaceship Designer related settings which will open automatically
Getting started
Before reading on make sure you have Spaceship Designer open and have a new and empty scene in front of you.
Start designing
Start by placing assets (modules and/or single objects) in to the scene, the progress is stored as a blueprint by:
   1. Selecting the Save as... option from the File dropdown menu
   2. Selecting the New File... option
   3. Determining a name for the blueprint
   4. Pressing Enter for confirmation
Saving progress
Blueprints are saved on a server and they are displayed as assets under My Ship Blueprints (saved on server). The blueprints can also be opened as whole scenes from the File → Open my blueprint... option.
When storing blueprints the whole scene is saved. This means not just the actual ship design is saved, but all scattered and misplaced assets and their transforms (location and rotation) are also saved, unless the option Save selection as… is chosen, in which case only the selected objects are stored. Selecting the Save option or pressing the save icon in the top bar overwrites the currently opened blueprint, unless there isn’t one open and in which case the Save as.. window is opened.
Saving as... window’s options.
Version control
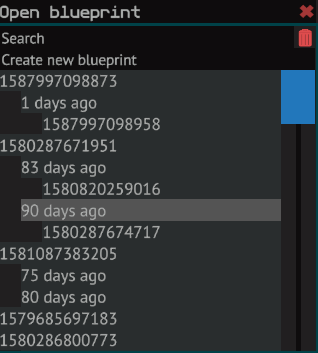
Saving on server creates a blueprint of the chosen New File... name. All future variants of the blueprint are saved as versions under that blueprint folder. Those versions each have their unique ID number. Each version generates one version, so all save actions during a session are stored under one version. If you continue working on the same blueprints for multiple days, the saves will be separated into sub-folders marked "x days ago"
Open blueprint -window displays all the blueprint folders and their versions available
Saving upon exit
When exiting Spaceship Designer there will be a prompt asking about saving. The window is the same as when pressing Save as..
Continuing design
Continuing from a pre-existing blueprint can be done in three ways:
- Open File dropdown menu, choose Open my blueprint… and select a blueprint version from the container list. This option replaces the existing scene (and everything in it without a promt for saving) with the selected blueprint file’s scene.
- Select your blueprint from the My Ship blueprints (saved on server) -folder located in Asset Browser and place it into the scene. Note: placing anything from Asset Browser (including whole ships) into a new scene is not considered as a new project and doesn’t have a trace of previous scenes. This means that in order to save your progress you need to Save as.. again, since Save doesn’t know what to overwrite.
- Open File dropdown menu, choose Open premade blueprint… and select a blueprint from the list. On this list, you can find existing ship design blueprints made by Frozenbyte developers. It might be useful to analyse them to take some pointers for your own designs. This option also replaces the existing scene.
When saving on a pre-saved scene you can use the File → Save option, the save icon or just the hotkeys Ctrl + S to save your progress.
Test Flight Mode
The test mode is a simulated instance where you can witness how the ship would behave in-game. Every now and then when designing your ship it is good to take it out for a test ride. You can enter test mode and observe the functionality and handling of the ship by pressing F5 or the icon resembling a rocket in the top bar. Pressing F5 again or choosing "Exit Test Flight Mode" in ESC menu exits test mode and returns the player to the previous state and camera view prior to entering test mode.
Everything that happens in the test mode stays in test mode so it’s perfectly safe to mess around in it without damaging your ship. Take note that this includes also all possible improvements done in test mode, such as using the cabling tool, modifying device fields and editing YOLOL-chips etc.
Multiplayer
Spaceship Designer multiplayer means players can work on the same project in the same scene in real-time. Multiplayer session consists of a single host and any number of clients. A multiplayer session is created by players being in the same group and accessing the Spaceship Designer from a Spaceship Designer specific terminal.
Players are visualized as light spheres inside wireframe cubes. This is a temporary solution and before it’s fixed distinguishing players from one another can be difficult.
Session
The session is stored by the host and only the host’s blueprint scenes can be used. Although clients are able to place their own blueprints that are available in the My Ship Blueprints (saved on server) -folder in the Asset Browser.
Placing assets
Players can choose objects from the Asset Browser and place them to the scene and all other players are able to see the placed assets and interact with them. Whenever an object is selected by a player it is highlighted with red colour to all other players to signal that that object is reserved to another player and can’t be interacted upon, until it’s deselected by the initial player.
MUUS and undo/redo
MUUS content is unique to each player and at the moment only the host is able to see MUUS actions. Undo and redo actions are also reserved for players that have interacted with those objects most recently
Spawning ships in-game
Blueprints designed in Spaceship Designer can be spawned as built ships in-game. However, the custom made ships need to be first bought from the the Spaceship Designer, despawn the ship and then spawn it in the docks. They can be spawned from certain panels at certain docks. Note that you can only build one ship at a time in the Spaceship Designer. If you build two ships in one blueprint, you can only spawn one of them.
Where
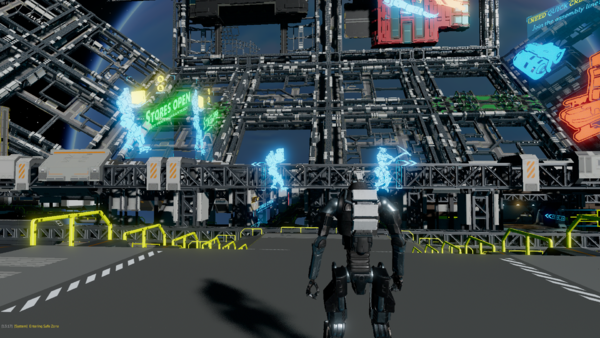
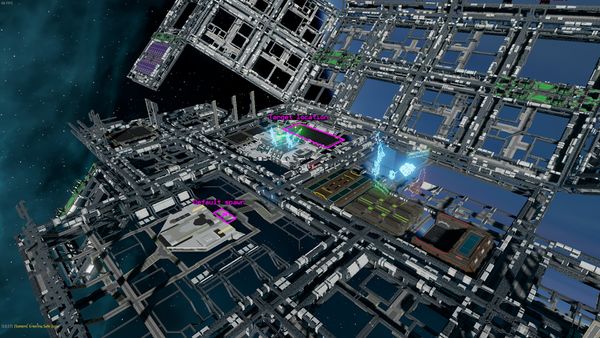
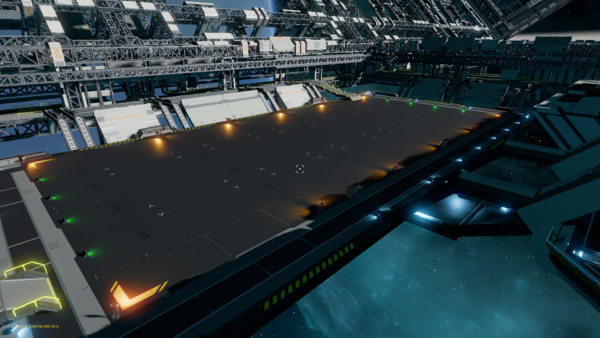
The spawn panels are located on the landing platforms located near the default spawning area of the Mega Station, or the Origin where you can fast travel with the incurance transfer service (ESC → MENU → INSURANCE TRANSFER SERVICE). From the default first person view orientation the landing platforms are located slightly to the left.
The default spawning place
A bird’s-eye view from the same situation. The arrow is pointing to the defaul view direction.
How
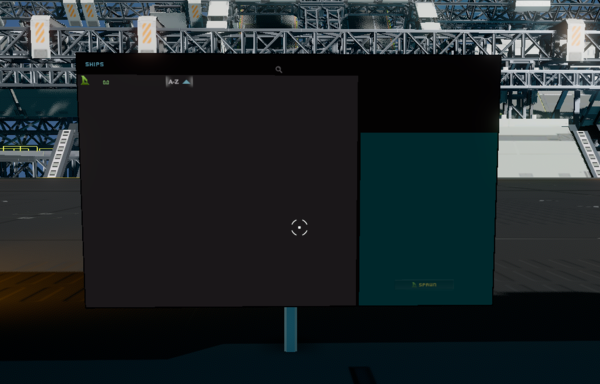
Upon reaching one of the panels the player is shown a list of their blueprints (atm. only version IDs of the blueprint containers). Clicking on a selected ID with MB1 spawns that current blueprint’s scene content behind the panel.
Common hotkeys
- Move tool: 1
- Rotate tool: 2
- Select tool: 3
- Bolt tool: 4
- Cable/pipe tool: 5
- Durability tool: 6
- Snap tool: 7, V
- Socket tool: 8
- Autobolt tool: 9
- 90° Rotate over n-axis: n = Z, X or Y
- Free rotate over n-axis: n = Z, X or Y pressed + move mouse
- Undo: Ctrl + Z
- Redo: Ctrl + Y
- Area select: MB1 + drag
- Add to selection: Shift + MB1
- Remove from selection: Ctrl + MB1
- Copy: Ctrl + C OR with move tool active + Shift + MB1 + drag on any axis
- Paste: Ctrl + V
- Cut: Ctrl + X
- New module: Ctrl + E
- Attach object(s) to a module: Ctrl + R + MB1
- Detach object(s) from a module: Ctrl + Shift + R
- Toggle Test Flight Mode: F5
- Move camera angle: MB2 pressed + move mouse
- Move camera: W/A/S/D (+ Shift for increased speed)
- Move scene (without moving camera/angle): SPACE/MB3 + move mouse
