Spaceship Assembly Guide
Summary
This guide is an introduction to spaceship building in Starbase. It will introduce the basics of spaceship hull structure, and basic devices and machinery needed for a working spaceship.
Good To Know Before Starting
- You should have basic knowledge of device configurations and YOLOL in Starbase, as this guide includes machinery and devices.
- You should have basic knowledge of the Spaceship Designer before attempting spaceship assembly.
- Spaceship Designer: Pre-made blueprints/Tutorials/Tutorial Starter Spaceship
- In Spaceship resources you will find information about different resources that spaceships will use.
Spaceship Requirements
Each spaceship requires the following things to fly:
- Valid Frame/Hull
- Thrusters
- Powersource: Generator or Batteries
- Propellant for thrusters
- Data Network
- Pipe network for propellant
- Ship controls and basic configuration
Valid Frame And Hull Structure
- All spaceships need to be built according to the durability rules in order to be able to fly without breaking.
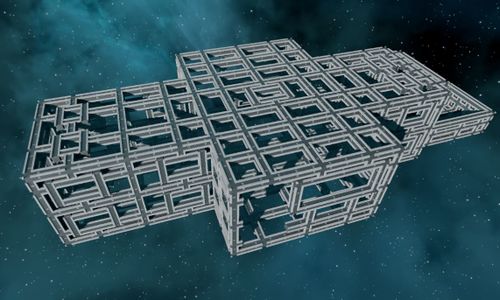
- Foundation of the durability rules is the frame of beams which forms the ship’s hull, and to which everything else is attached to.
Beam Frame
- A valid ship frame consists of beams connected to each other with welds, and a valid thruster base (Device hardpoint) is connected to the beams directly.
- The hardpoint is connected to beams with at least two bolts, and an actual thruster is in contact with the hardpoint.
- The thruster has to be properly positioned (forming a data connection with the base) and connected to the same frame as the base.
- Ship frame must be consistent, there can't be two different frames that are not connected to each other.
- If there are two separate frames, the bigger one will be used as there can be only one frame.
Plates
Outer Plates
- Outer plating protects the ship from weapon fire, collisions and radiation during warp travel.
- There should not be any gaps on the exterior plating of the ship, otherwise radiation gets through during warp travel. Beams and plates withstand normal flying and there can be exposed beams if the ship is not meant for warp travel.
- Plates are connected to the frame with bolts.
Inner Plates
- The main difference between inner and outer plates is the material.
- Inner plating is not necessary regarding the ship's durability and ability fly, but makes it easier to walk inside the ship, and helps with weapon damage.
- It is recommended to have at least some interior plating to make character movement smoother and make the ship interior more aesthetic.
- Interior plating also helps when placing machinery, devices, cables and piping.
Hardpoints
- Thrusters and other machinery outside the ship’s hull have to be connected to the ship’s data network.
- Thrusters also need to be connected to the ship’s propellant gas network.
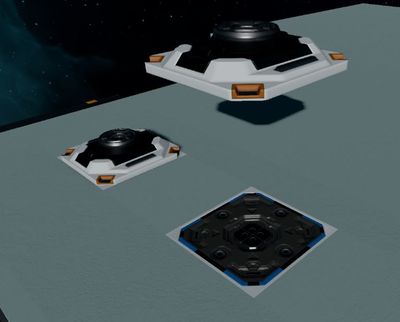
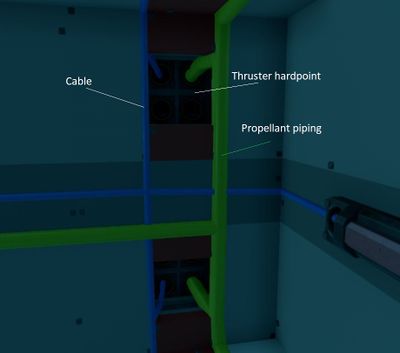
- Connecting thrusters and machinery to the spaceship networks is done with hardpoints.
- Hardpoints have pipe and cable slots for connecting pipes and cables. This means hardpoints need to be placed on the frame so that cabling and piping can be done.
- As thrusters need hardpoints to work, it is important to pay attention to where to place the hardpoints. Thruster locations greatly affect how the ship flies and how easily the ship can be maneuvered.
Modules
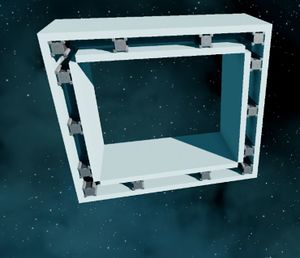
- Modules are plates, beams, etc. which are grouped together. The purpose of the modules is to make constructing spaceships faster and easier than using single parts.
- Every module has at least one Parent Object (Green Sphere) that ties the objects in the module together. Modules can be moved and rotated as a whole by having green sphere selected (module icon).
- It is highly recommended that beginners start building with modules.
- Using modules should automatically ensure that the spaceship structure is correct.
- Modules are the best way to learn the building grid and good building patterns.
- There is a lot of different building parts in the game and this can be overwhelming at first. Using modules reduces the number of building parts you need to remember.
- The building process will be faster and the progress is easier to notice.
- Basic modules for smaller and medium sized ships are introduced in: Premade blueprints/Tutorials/Tutorial Starter Spaceship
- The basic modules are for building 90 degree angles. This means the hull will have box-like appearance at first. The hull can be decorated with decoration parts and normal plates later on.
The Grid
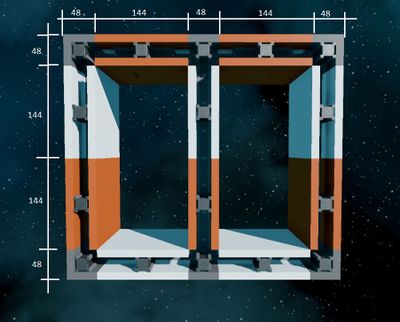
- Spaceship modules use a 48 cm grid. This is because the basic hull thickness is 48 cm.
- Outer plating (12 cm) + beam frame (24 cm) + inner plating (12 cm) = 48 cm
- Keeping the hull structure in the grid ensures that beams connect easily.
Bolting And Durability
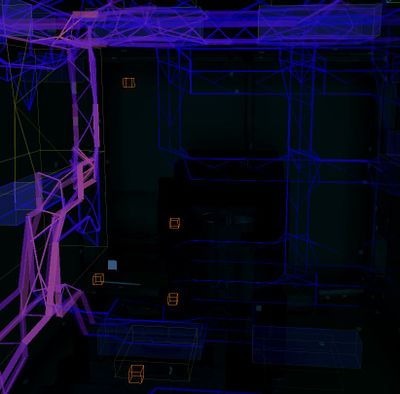
- Each part of the ship has its own mass. In durability calculations, the mass of different parts is transferred towards the frame via connections (bolts) and other parts. This means parts close to the frame need to support all the parts further away from the frame.
- When building your first spaceship, it is good to do test bolting and durability checks in the middle of the building process. This way you can avoid unnecessary extra work and keep the hull structure consistent all the time.
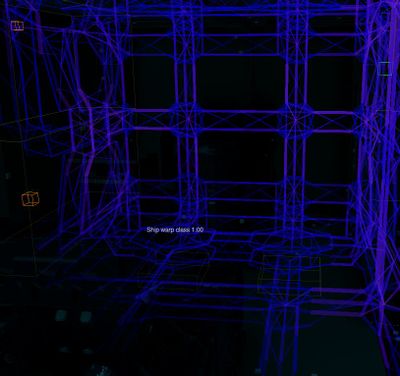
- Durability Tool will report No ship frame when there are no thruster bases with connected thrusters connected to the frame. When there is at least one thruster properly connected to the thruster base and both are connected to the frame with bolts, Durability Tool will show Ship Warp Class X. If the ship warp class is lower than one, it means there are parts which are poorly connected to the frame.
- When the Durability Tool shows warp class for the ship, it also means that a frame integrity check can be done. (Durability tool→ Right mouse button). The frame integrity check basically studies how solidly each frame beam (and whatever it supports) is connected to the frame-attached thrusters.
Thrusters
A spaceship needs thrusters to be able to fly and thrusters need to be bolted to the hull.
- Thrusters can be divided to two types: main thrusters and maneuver thrusters. Main thrusters generate forward movement and maneuver thrusters enable yaw, pitch and roll for example. Each thruster model can act as a main thruster or a maneuver thruster. To which movement the thruster will contribute, the defining factor is position and orientation of the thruster.
- Location of thrusters greatly affects how easy the ship is to maneuver. For example if your ship is missing forward facing thrusters, your ship won’t be able to fly backwards.
- Mass is also a factor when placing thrusters to your spaceship. Each beam, plate and machinery you have placed on your ship has mass. The bigger your ship is, more thrust it will need.
- Thrusters need electricity and propellant to work. Thrusters consume more propellant than power. This means civilian ships without weaponry can have smaller generators and mainly focus on propellant containers.
Maneuver thrusters
- Maneuver thrusters are usually smaller and don’t need to provide much thrust.
- There are three sizes of thrusters in Starbase: box thruster, triangle thruster and maneuver thruster. Each thruster can be used as a maneuver thruster even thought only one is named a ”maneuver thruster”.
Main thrusters
- Main thrusters are usually the thrusters that are facing backwards as this enables forward movement for the ship.
Maneuver thruster
- Max thrust: 50 000
- The small maneuver thruster is placed on a hardpoint
Box thruster
- Max thrust: 500 000
- The box thruster is connected to a hardpoint from the side and this thruster can’t be stacked
Triangle thruster
- Max thrust: 300 000
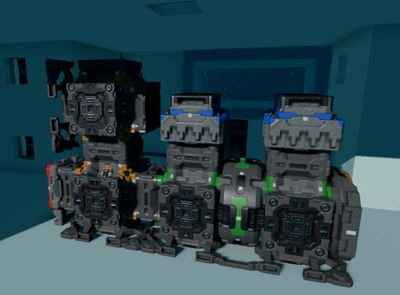
- The biggest difference the triangle thruster has compared to the other two thrusters is that it can be stacked. Only one triangle thruster needs connection with a hardpoint and more triangle thrusters can be connected to that thruster. Stacked triangle thrusters share same device field name which is linked to MFC and operate as a whole.
Power Source
Machines and devices need power in spaceships. Power can be provided with generator or batteries
Generator
Generator pieces are modular and can be used to build bigger and smaller generators.
Working generator will need at least one generator fuel chamber, one small fuelrod, one generator unit, one generator socket board, one generator cooling rack and one small cooling cell.
- Place the generator in a way that there is enough room to pull out the fuel rod
- Also make sure there is an easy access to the socket board and to the coolant cells.
- The generator parts need to be bolted together and the generator needs to be bolted to the ship.
- Generator cooling can also provided by using Radiator
Propellant
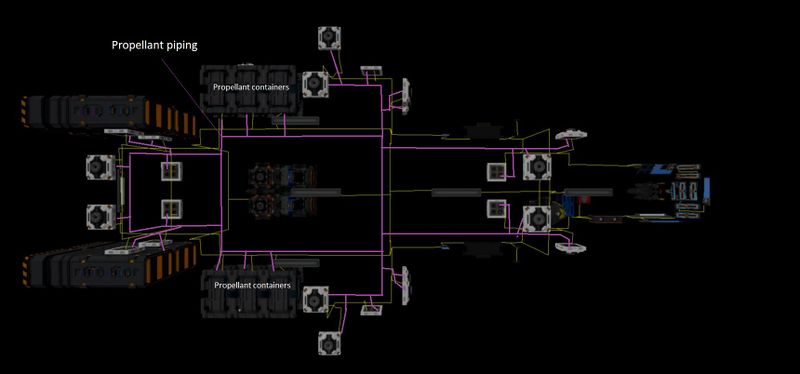
Thrusters need and consume propellant to work. Propellant is stored in propellant containers. The amount of containers spaceship will need depends on how many thrusters it has.
- There are three sizes of propellant containers: small, medium and large.
- While placing the propellant containers make sure there is an access to at least two of the sockets found in the tank support.
- The propellant container needs to be bolted to the ship.
Data Network
The spaceship needs a cable network to transfer electricity to all the machinery and data between all the devices.
- Use the cabling tool to connect all the machinery and devices to the same network.
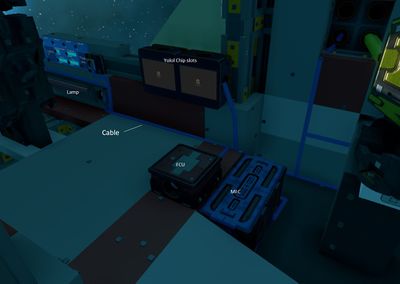
- Make sure that all the devices and machinery: thrusters, doors, MCU, FCU, levers, lamps and buttons are connected to the network.
Pipe Network For Propellant
The spaceship needs a pipe network to transfer propellant to all thrusters from propellant containers.
- Use Pipe tool to connect all propellant containers and hardpoints with thrusters.
- To get information from propellant network, containers also need to be in electricity network. Connecting one propellant container support to electricity network can be used to show the total amount of propellant in the pipe network.
Ship Controls And Basic Configuration
Spaceship thrusters can be controlled directly with levers, buttons and YOLOL. However YOLOL-configured thruster balance settings and flying are very ship specific configurations. The following guide explains how to use and configure Flight Control Unit (FCU) and Main Flight Computer (MFC) to do thruster balance calculations and settings for you.
- If you are interested about YOLOL configured thruster balance settings and flying you can examine Spaceship Vasama in the Spaceship Designer.
Flight Control Unit (FCU)
- The FCU gets input from control devices (levers and buttons) and sends it to the Main Flight Computer, which forwards it to the thrusters.
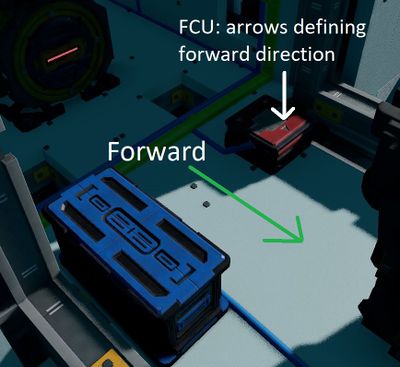
- The arrows on top of the FCU define the ”forward” direction of the ship.
- There can be more than one FCU connected to one Main Flight Computer.
- There are currently three FCU models in Starbase: Basic, Advanced and Premium model. Each model has a different set of ship movements available.
Basic model:
- FcuMfcIO (for connecting the MFC)
- FcuInputRange (Lever input range)
- FcuGeneralMultiplier (a "soft power switch", scales all output)
- FcuForward (moves the ship straight forward or combines FcuFwdBwd rotations with the forward movement)
- FcuBackward (moves the ship straight backward or combines FcuFwdBwd rotations with the backward movement)
- FcuRotationalPitch (in-place pitch rotation)
- FcuRotationalYaw (in-place yaw rotation)
- FcuRotationalRoll (in-place roll rotation)
Advanced model (in addition to the Basic controls):
- FcuUpDown (moves the ship straight up or down)
- FcuRightLeft (moves the ship straight right or left)
Premium model (in addition to the Advanced controls):
- FcuFwdBwdPitch (rotation combined to forward/backward movement)
- FcuFwdBwdYaw (rotation combined to forward/backward movement)
- FcuFwdBwdRoll (rotation combined to forward/backward movement)
Main Flight Computer (MFC)
- MFC is placed in the same data network with a Flight Control Unit and thrusters. The MFC and FCU share one identical device field name.
- MFC gets input from the Flight Control Unit and sends this data to the thrusters, telling them what to do. For example "pilot interacts with yaw lever". The FCU receives the information and sends it to the Main Flight Computer. The MFC then automatically decides which thursters are used to make the ship yaw.
- Each thruster group is controlled by exactly one MFC. There can be several MFCs in one ship.
Levers
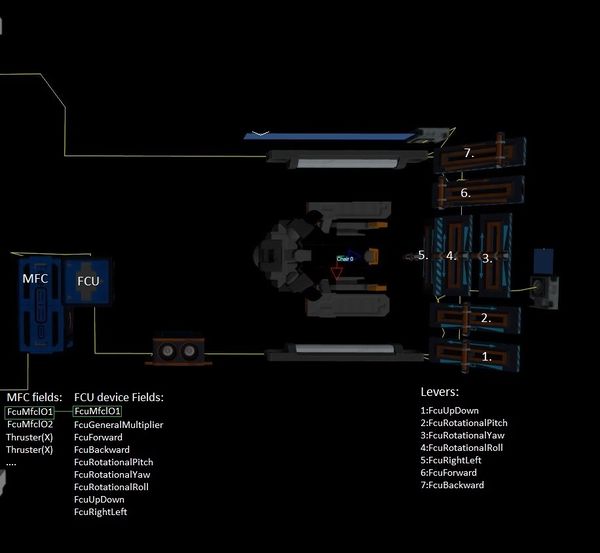
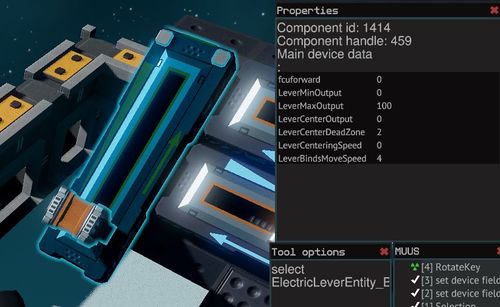
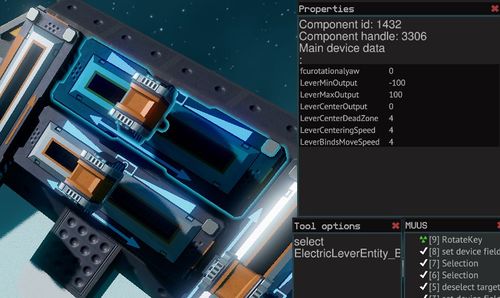
The Flight Control Unit (FCU) gets input from control devices like levers and buttons. To get the levers to work with an FCU you need to configure the lever device fields to match with the FCU device fields (see picture below).
Lever Examples
Note! These are examples for a ship that has an FCU and an MFC. Also the FCU input Range is set to 100.
Thruster configuration
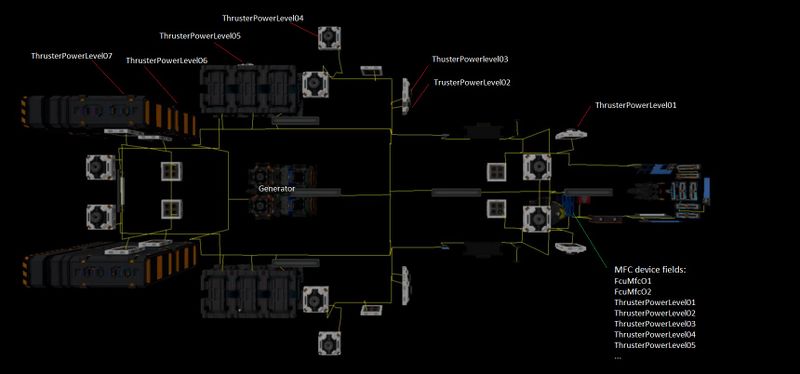
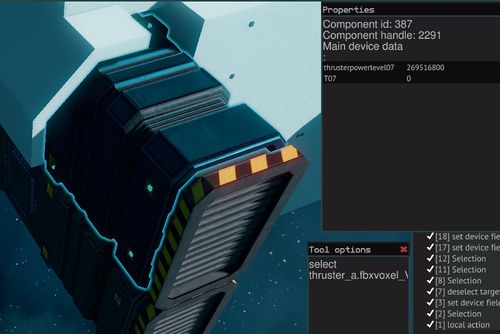
The Main Flight Computer controls the thrusters. One MFC can handle 50 thrusters, which means there are 50 device fields for thrusters in an MFC (thrusterPowerLevelXX). These field names are set for ship's thrusters. Field names can be renamed but each thruster should have a unique device field name (excluding stacked triangle thrusters).
A configured thruster: When a thruster is connected to same data network with an MFC and is given matching field name with the MFC thruster list, the values should automatically update and be the same. Also in this case ThrusterCurrentThrust field name has been changed to T07 ( This can be linked to Progress Bar)
Troubleshooting
Checklist
Each spaceship needs the following things to fly:
- Valid frame/Hull
- Thrusters
- Powersource
- Propellant for thrusters
- Data Network
- Pipe network for propellant
- Ship controls and basic configuration
My ship is not moving?
- Check durability and bolting→ Thruster hardpoints are bolted to the frame and thrusters are bolted to the hardpoints/ hull. The ship frame is consistent and bolted.
- Thrusters need electricity and propellant → Check cabling and piping (all thruster hardpoints are connected to the electricity network and to the propellant pipe network.
- Electricity network (cable) is connected to the generator. Check that the generator has all the necessary parts → see 3. Powersource/generator
- Pipe network is connected to the propellant containers → see Pipe network for propellant
- Check the thruster configuration → see thruster configuration (matching device field names and values in MFC and in thrusters (If the ship is using an MFC)
- Check matching device field names in the MFC and FCU → see picture in Levers section
- Check matching device field names in the levers and in the FCU → see picture in Levers section
When I start flying my ship, some pieces of the ship detach?
- Use the Durability Tool. Check that everything is green and bolted.
My ship is almost symmetrical but still doesn’t fly straight/ turns easier to one direction?
- Some thrusters might not be working → Check : 1 , 2, 3, 4 ,5
All thrusters seem to working but ship yaw/pitch/roll is slow?
- In some cases you might need re-position thrusters or add more thrusters. Upgrading FCU to premium model which has combined movements possibilities can also be helpful in some cases.
