Difference between revisions of "Lot Designer Guide"
(Created page with "==Access== This is how to access the Lot Designer. '''Step I''' Start the game and choose ''Enter Universe'' from the main menu. 600px...") |
m (added Lots category) |
||
| (11 intermediate revisions by 4 users not shown) | |||
| Line 16: | Line 16: | ||
'''Step III''' | '''Step III''' | ||
Once you've entered the world look for a free lot. Lots are found in these areas on the edges of the station. | Once you've entered the world look for a free lot. Lots are found in these areas on the edges of the station, and there's different sizes to choose from. | ||
[[File:lot_locations.jpg|600px]] | [[File:lot_locations.jpg|600px]] | ||
| Line 37: | Line 37: | ||
After pressing ''Edit'' you should be greeted with a view like this: | After pressing ''Edit'' you should be greeted with a view like this: | ||
[[File: | [[File:starbase_lot_designer_default_view_1_2020-05-15.png|600px]] | ||
The UI-elements will be explained in the next section: | The UI-elements will be explained in the next section: | ||
| Line 45: | Line 45: | ||
=== Asset Browser === | === Asset Browser === | ||
[[File: | [[File:starbase_lot_designer_asset_browser_view_1_2020-05-15.png|500px]] | ||
Asset browser works as the inventory of all your building blocks. Every module required for building a station can be found here. You can change the library view by right clicking the folders, and choosing between icons and names. | |||
<br>Here are the folder explanations: | |||
'''Halls''' | |||
*Halls are room-like modules which differ greatly in size and layout. Hall floors are left empty, which leaves more room for player-made decorations. | |||
'''Hallways''' | |||
*Hallways are designed to create enclosed paths between halls, but they can be used in various other ways as well. For example they can be used to create extra wings to hall modules, or used as adapters between different sized connection ports. | |||
'''Lot size - Small / Medium / Large''' | |||
*All the modules in these folders require at least their descriptive sized lot area to function. These folders make it easier to find modules compatible to your very own rental lot. | |||
'''Connection port - Small / Wide / Large''' | |||
*Connection ports can be found in each and every Lot Designer module, as they are the parts from where their paths and structures connect. There are three connection port sizes: small, wide and large, and the ports need to be of the same size in order for them to connect. | |||
'''Placement''' | '''Placement''' | ||
| Line 124: | Line 138: | ||
== Building == | == Building == | ||
Once you are | Once you are finished with the design you can start building by using the '''Building Tool''' or the '''Welding Tool'''. | ||
# In order to be able to to build the design, the construction needs to have a built connection to the lot's entrance, either directly or through other constructed parts. The parts that do not have a built connection to an entrance cannot be built. | |||
# The filling, or the "painting", of the parts in the module has to be started from the part that is connected to the lot's entrance. | |||
# Filling parts that have no direct connection to the entrance of the lot is only possible when the part has a connection to the entrance through other fully constructed parts. | |||
# Only the parts that are considered as part of the module frame need to be constructed. Building anything else in a module is optional. | |||
# The module frame consists of plates (excluding decorative plates) and windows. Decorative plates, furniture, devices and the like are not considered as parts of the module frame. | |||
# When all of the parts considered as the frame in a module are fully constructed, work on the next connected module can begin. | |||
# Constructing modules that have no direct connection to the lot's entrance is only possible when they have a connection to the entrance through modules with a fully constructed frame. Once again, filling the parts in the module has to be started from the part that is connected to a module with a fully constructed frame. | |||
=== Building tool === | === Building tool === | ||
| Line 130: | Line 152: | ||
[[File:buildingtool.png|100px]] | [[File:buildingtool.png|100px]] | ||
To build with the ''Building Tool'' you need to equip it and have building materials either in | To build with the ''Building Tool'' you need to equip it and have the building materials either in your ''Station Storage'' or in the crates of your ship. The most common building material is ''Valkite'', so stocking up on it will get you far when building blueprints. | ||
The part you want to build with the ''Building Tool'' | The part you want to build with the ''Building Tool'' needs to turn green, indicating it can be built. | ||
[[File:Sb_lot_tutorial.png|600px]] | [[File:Sb_lot_tutorial.png|600px]] | ||
If you have the | If you have enough of the required materials, you will be able to build. To build, just press ''MB1 (Mouse button 1)'' and "paint" the part. | ||
[[File:Sb_lot_tutorial_2.png|600px]] [[File:Sb_lot_tutorial_3.png|600px]] | [[File:Sb_lot_tutorial_2.png|600px]] [[File:Sb_lot_tutorial_3.png|600px]] | ||
| Line 156: | Line 178: | ||
[[File:unwelding.png|600px]] | [[File:unwelding.png|600px]] | ||
[[Category:Guides]] | [[Category:Guides]] [[Category:Lots]] | ||
Latest revision as of 15:13, 17 February 2021
Access
This is how to access the Lot Designer.
Step I
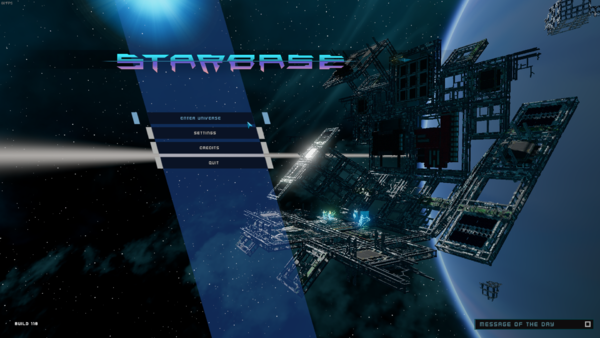
Start the game and choose Enter Universe from the main menu.
Step II
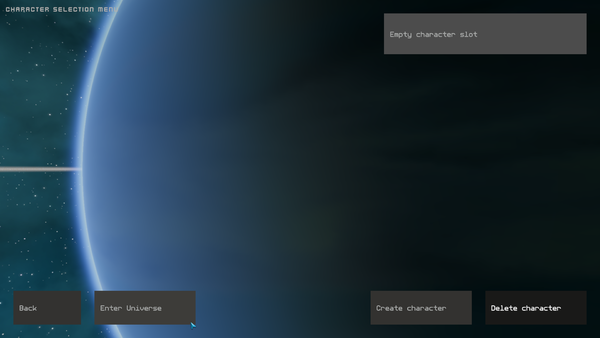
This takes you to the character selection menu. Choose Create character and then Enter universe. If you already have created a character, you can just choose Enter universe.
Step III
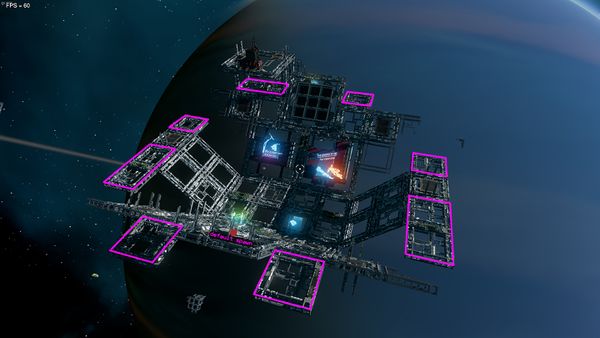
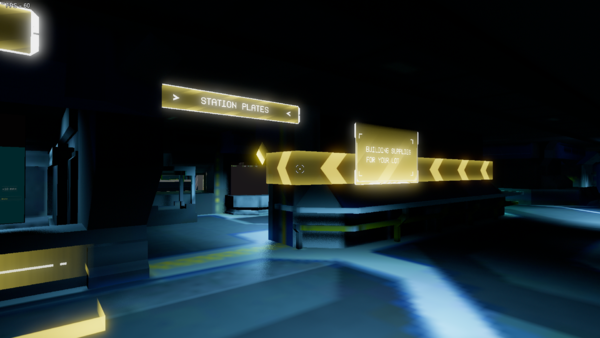
Once you've entered the world look for a free lot. Lots are found in these areas on the edges of the station, and there's different sizes to choose from.
Step IV
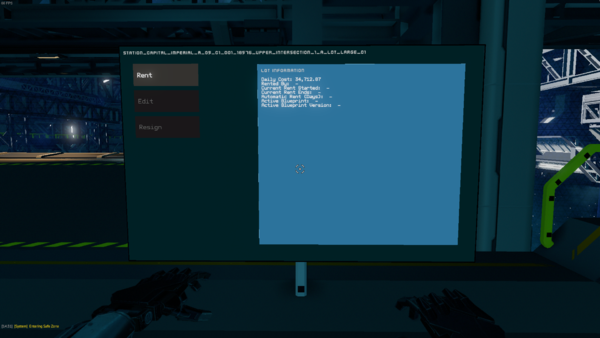
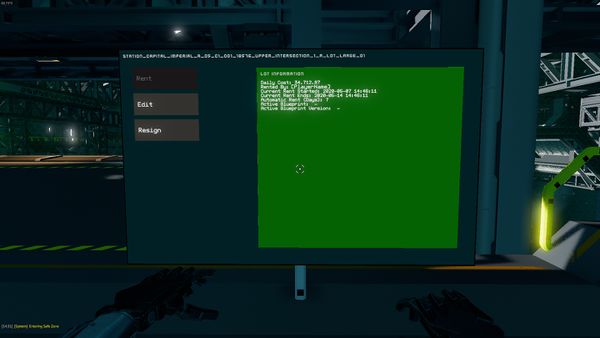
Once you've found a free lot you should find a terminal near its entrance with the information of the lot's daily cost. To rent the lot press Rent
(Note that there can be multiple entrances and therefore multiple terminals connected to a single lot. They all share the same lot information, so feel free to use any of them at any given time.)
Step V
Once the lot is rented, you should be able to select Edit
Step VI
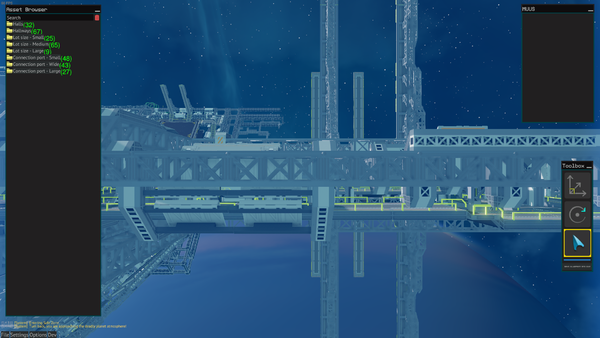
After pressing Edit you should be greeted with a view like this:
The UI-elements will be explained in the next section:
UI elements
Asset Browser
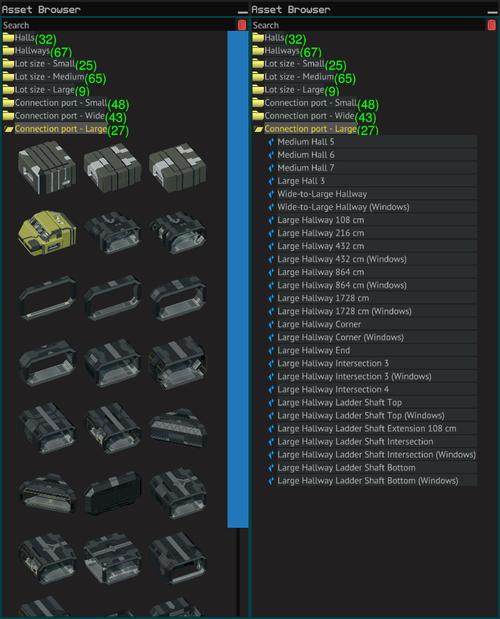
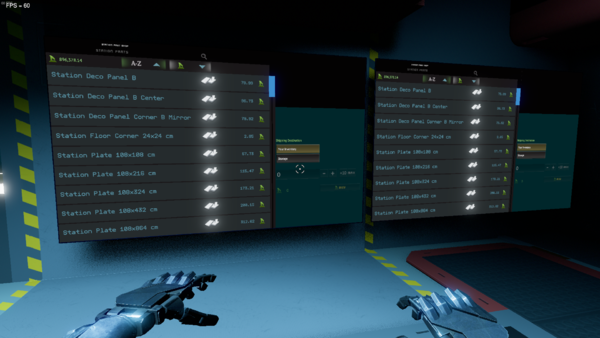
Asset browser works as the inventory of all your building blocks. Every module required for building a station can be found here. You can change the library view by right clicking the folders, and choosing between icons and names.
Here are the folder explanations:
Halls
- Halls are room-like modules which differ greatly in size and layout. Hall floors are left empty, which leaves more room for player-made decorations.
Hallways
- Hallways are designed to create enclosed paths between halls, but they can be used in various other ways as well. For example they can be used to create extra wings to hall modules, or used as adapters between different sized connection ports.
Lot size - Small / Medium / Large
- All the modules in these folders require at least their descriptive sized lot area to function. These folders make it easier to find modules compatible to your very own rental lot.
Connection port - Small / Wide / Large
- Connection ports can be found in each and every Lot Designer module, as they are the parts from where their paths and structures connect. There are three connection port sizes: small, wide and large, and the ports need to be of the same size in order for them to connect.
Placement
The objects are placed in the scene by selecting the wanted asset from the Asset Browser by a single click of the MB1 (Mouse Button 1), moving it to the wanted position, and then placing it on the scene by another click of the MB1. Before placing, the object is in a preview state, which is visualized by the green highlight color of the object. The previewed object can be rotated clockwise in 90-degree intervals around the Z, Y or X axes by pressing Z, Y or X. Holding down the keys and moving mouse horizontally will rotate the object in 15-degree increments and rotation can be reset by pressing Q.
View mode
Assets in the Asset Browser can be viewed by their names or unique icons. The view can be changed by a MB2 (Mouse Button 2) click on the window.
Toolbox
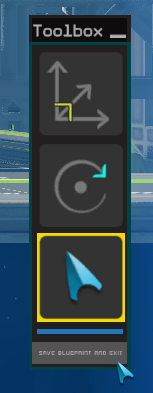
The toolbox has all the tools that are needed for designing a station. The currently active tool is highlighted by a yellow rounded rectangle around the tool. The available tools are explained individually in Tools-section. The toolbox also includes the Save blueprint and exit-button.
MUUS
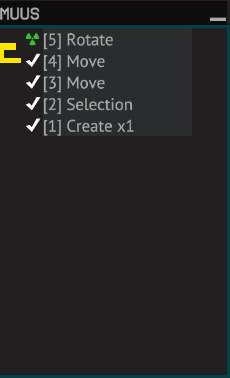
MUUS stands for Multi User Undo System. It's designed to work with multiple users who are working in the same scene, but it works like a regular undo-system when working solo. Nearly all actions create a new step into MUUS. You can undo one step at a time or choose a certain step and undo every action done after that. One-click with the MB2 on a row opens up a menu where you can choose to undo or redo that step (and any steps related to that).
Tools
Unlike the Spaceship Designer, the Lot Designer does not have that many tools to operate but they are all explained in this section. Basic operators copy (Ctrl + C) and paste (Ctrl + V) are also included in the toolset.
Move tool
Hotkey: 1
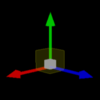
Move tool is used whenever transforming selected objects from one location to another. Movement can be done by any three axis, of which X is represented by red, Y by green and Z by blue colored arrows. Free movement is possible by clicking on the gray cube in the center of the move tool symbol.
- Select one object by a single click of the MB1
- Continue selecting individual objects by keeping the Shift-button pressed while clicking the MB1
- Remove individual objects by keeping the Ctrl -button pressed while clicking the MB1
- Use area selection with MB1 pressed down and moving the cursor over all the objects you want to choose (note: area select also affects objects behind others, so depth needs to be taken into consideration as well to prevent accidental selection of unwanted objects).
- Adding and removing from selection works as well; keep Shift pressed and area selecting only adds to the selection, and keep Ctrl pressed and area selecting only removes from the selection
Rotate tool
Hotkey: 2
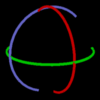
Rotate tool is for rotating objects around its axis. Similar to the move tool the rotate tool is also operated by clicking and dragging on the widget but instead of arrows you select curves. Red for X, green for Y and blue for Z. The rotation is done by 15 degree intervals. The selected object can also be rotated in 90-degree intervals around the Z, Y or X axes by pressing Z, Y or X. Holding down the keys and moving mouse horizontally will rotate the object in 15-degree increments and rotation can be reset by pressing Q.
Select tool
Hotkey: 3
The select tool is used when selecting single objects or several objects at once. Selected objects are represented with a bright blue highlight.
- Select one object by a single click of the MB1
- Continue selecting individual objects by keeping the Shift-button pressed while clicking the MB1
- Remove individual objects by keeping the Ctrl -button pressed while clicking the MB1
- Use area selection with MB1 pressed down and moving the cursor over all the objects you want to choose (note: area select also affects objects behind others, so depth needs to be taken into consideration as well to prevent accidental selection of unwanted objects).
- Adding and removing from selection works as well; keep Shift pressed and area selecting only adds to the selection, and keep Ctrl pressed and area selecting only removes from the selection
Getting started
Start designing
Start by placing modules into the scene. Building has to be done module-by-module starting from the lot's entrance (Note: there can be multiple entrances, depending on the lot). Blueprints with no connection to any of the lot's entrances are not buildable. Once you are done with your design, or want to continue it later, select Save blueprint and exit from the toolbox.
Continuing design
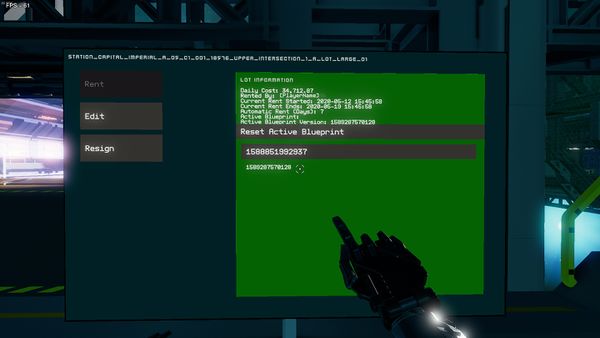
To continue your design access the lot terminal connected to your lot, choose the blueprint you want to work on and press Edit. You can also reset the chosen blueprint by selecting Reset Active Blueprint.
Building
Once you are finished with the design you can start building by using the Building Tool or the Welding Tool.
- In order to be able to to build the design, the construction needs to have a built connection to the lot's entrance, either directly or through other constructed parts. The parts that do not have a built connection to an entrance cannot be built.
- The filling, or the "painting", of the parts in the module has to be started from the part that is connected to the lot's entrance.
- Filling parts that have no direct connection to the entrance of the lot is only possible when the part has a connection to the entrance through other fully constructed parts.
- Only the parts that are considered as part of the module frame need to be constructed. Building anything else in a module is optional.
- The module frame consists of plates (excluding decorative plates) and windows. Decorative plates, furniture, devices and the like are not considered as parts of the module frame.
- When all of the parts considered as the frame in a module are fully constructed, work on the next connected module can begin.
- Constructing modules that have no direct connection to the lot's entrance is only possible when they have a connection to the entrance through modules with a fully constructed frame. Once again, filling the parts in the module has to be started from the part that is connected to a module with a fully constructed frame.
Building tool
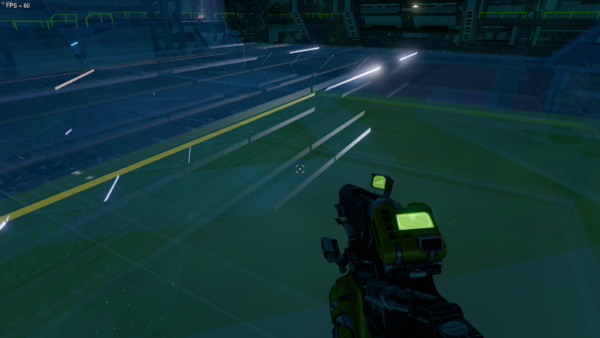
To build with the Building Tool you need to equip it and have the building materials either in your Station Storage or in the crates of your ship. The most common building material is Valkite, so stocking up on it will get you far when building blueprints.
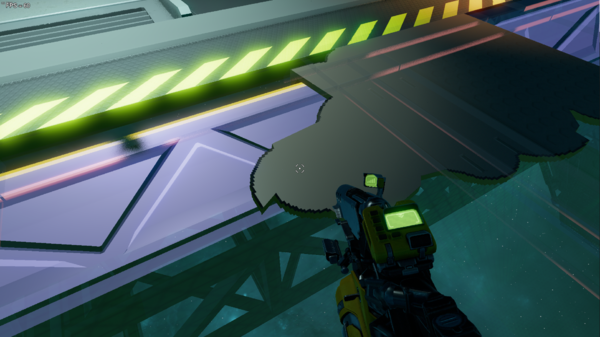
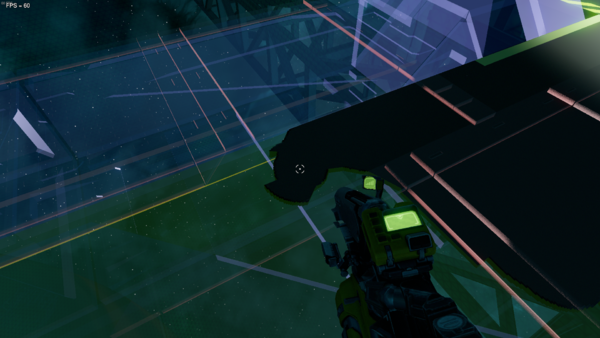
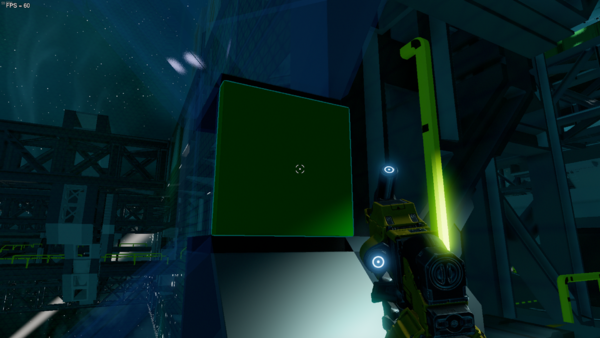
The part you want to build with the Building Tool needs to turn green, indicating it can be built.
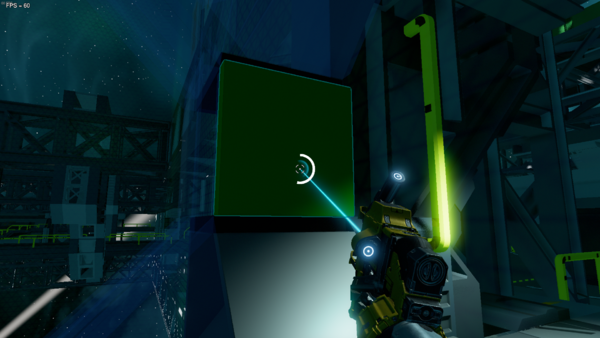
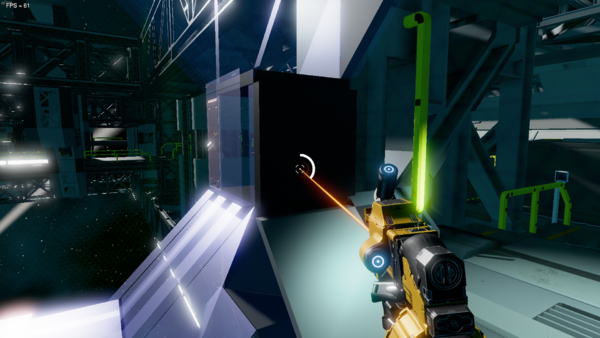
If you have enough of the required materials, you will be able to build. To build, just press MB1 (Mouse button 1) and "paint" the part.
Welding tool
You can also build your blueprint with the Welding Tool. The Welding Tool needs a power pack in order to function. You need parts to weld in order to build your blueprint. These parts can be bought from the Marketplace.
Once you have the needed plates and other parts you can start building. When welding, the parts need to be touching something that is part of the station, meaning you can't weld something into thin air. Just place the plate where it fits, when it turns green it can be welded by holding MB1 for approximately two seconds. A circle around the welding point will indicate when the part has been welded.
You can unweld a part by pressing MB2 for approximately two seconds
